I have been making naturally dyed Easter Eggs for years, and it is always fun to see the colors that you can create from nature. This year I saw some Onion Dyed Easter Eggs on Pinterest that had leaf patterns imprinted on them. I decided to make some of my own, using herbs along with a wider variety of natural dyes. Here are my natural herb stenciled Easter Eggs!

They came out even better than I expected, and weren’t too difficult to make either. Pantyhose are used to hold the herbs tight against the eggs during the dying process. Although the original project used blown eggs I hard boiled my eggs, because it seems simpler to me, and because my kids love hardboiled eggs for a snack. Here is how I created the Easter Eggs.
Herb Stenciled Easter Eggs
Materials:
- A dozen eggs
- Turmeric
- Red cabbage
- Onion skins
- Herbs – cilantro, parsley, dill
- Old nylon stocking
- Rubber bands
- Saucepan
- Mason jars
Directions:
- First, I hard boiled 8 of the eggs.
- I made two different natural dyes using turmeric and red cabbage.
- For the turmeric I added 1 Tablespoon of turmeric to 3 cups of water, and boiled it for half an hour.
- For the red cabbage I cut up about 2 cups of cabbage, added 3 cups of water and boiled it for half an hour.
- I drained the red cabbage water and cooled both dyes, and put them in mason jars, adding 1 Tablespoon of vinegar to each jar.
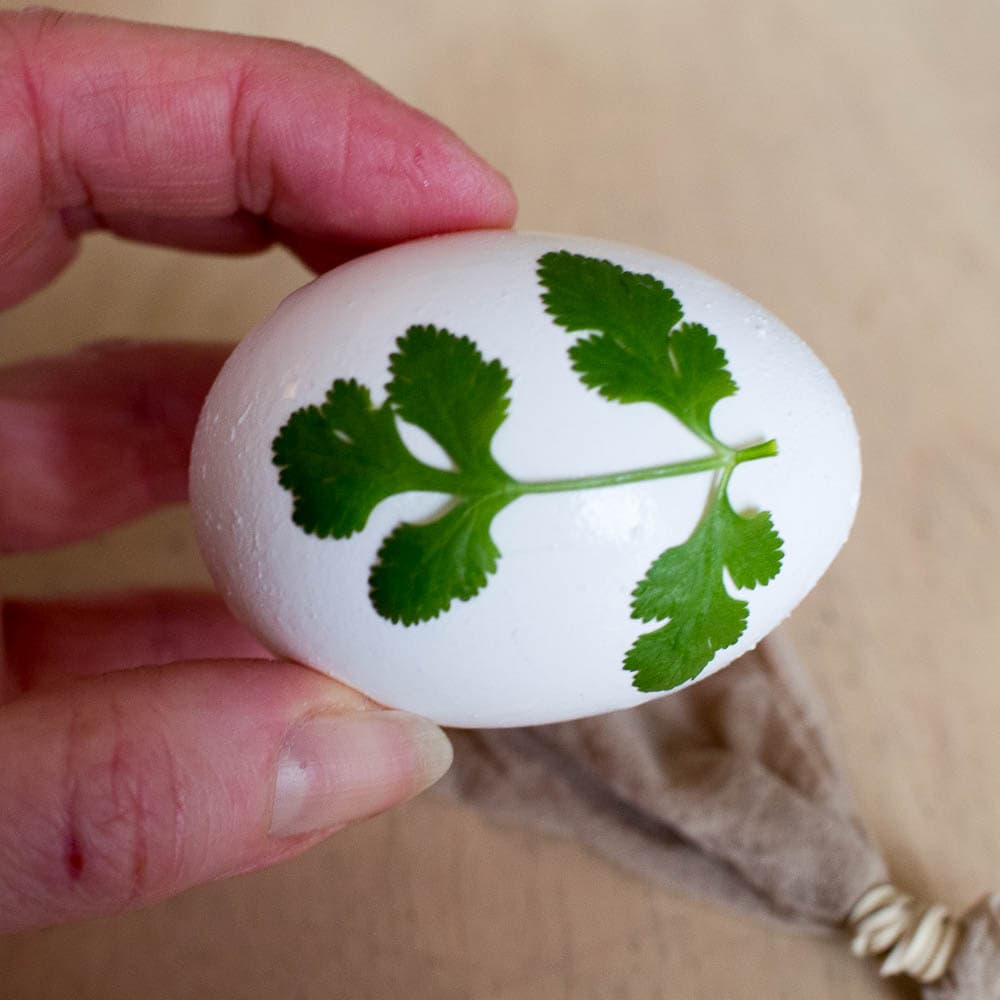
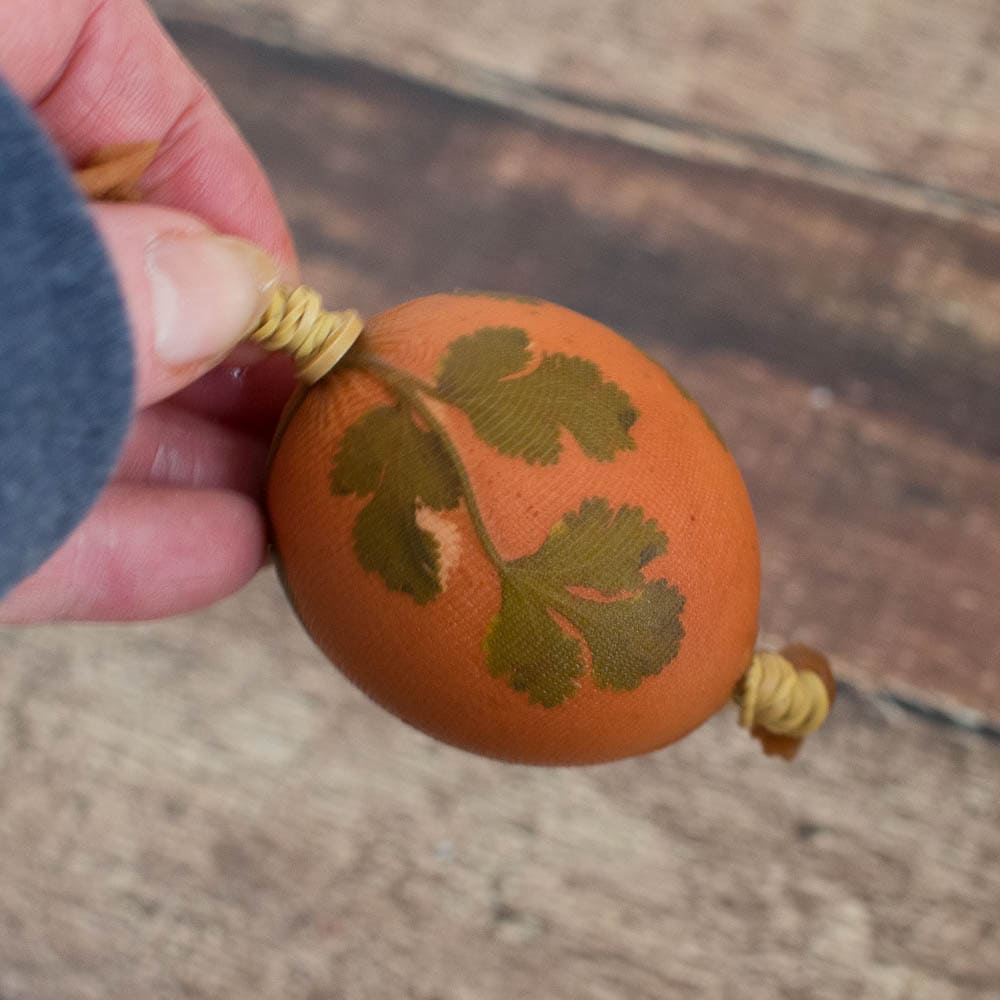
- To make the pattern on the hard boiled eggs I laid herbs flat on them. I found it was easier to make the herbs lay flat if both the eggs and herbs were damp. I used cilantro, dill and parsley, and the cilantro was the easiest to work with.

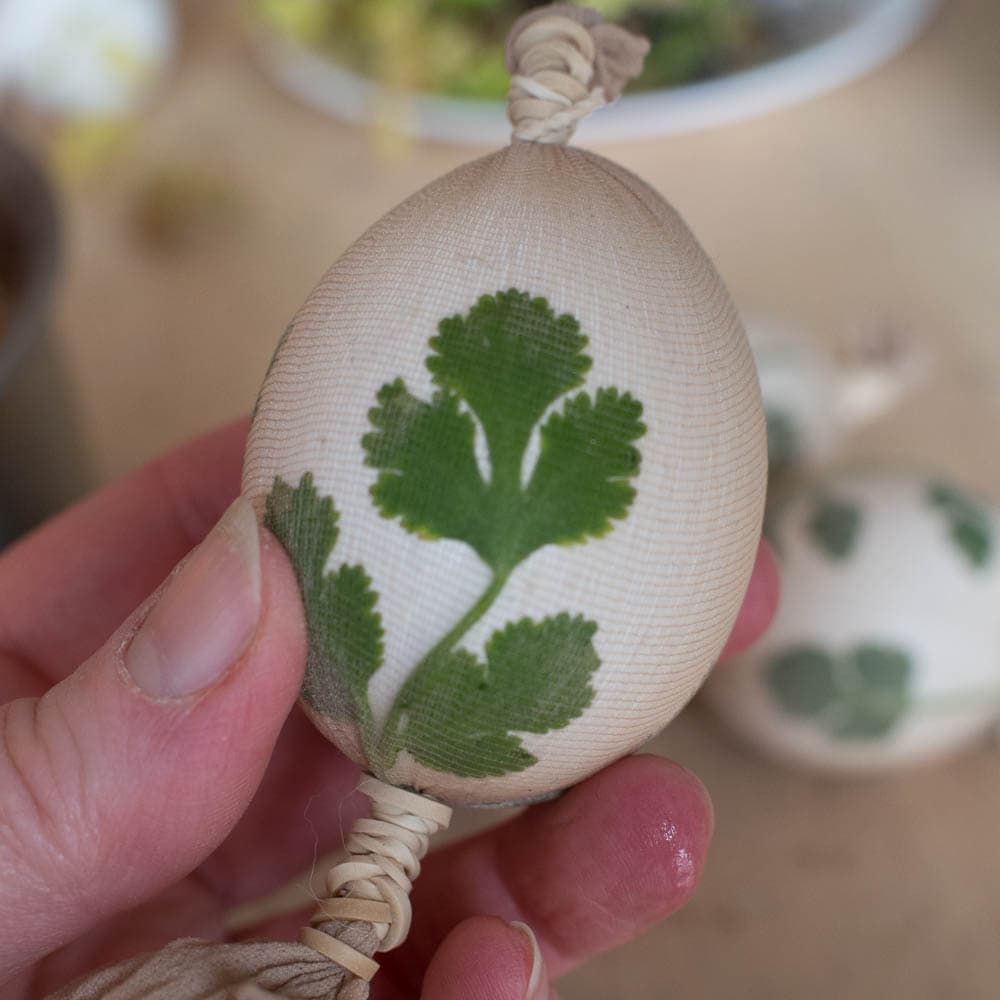
- Then I cut pieces from the leg of an old pair of stockings, and rubber banded them around the eggs. The stockings hold the herbs in place.
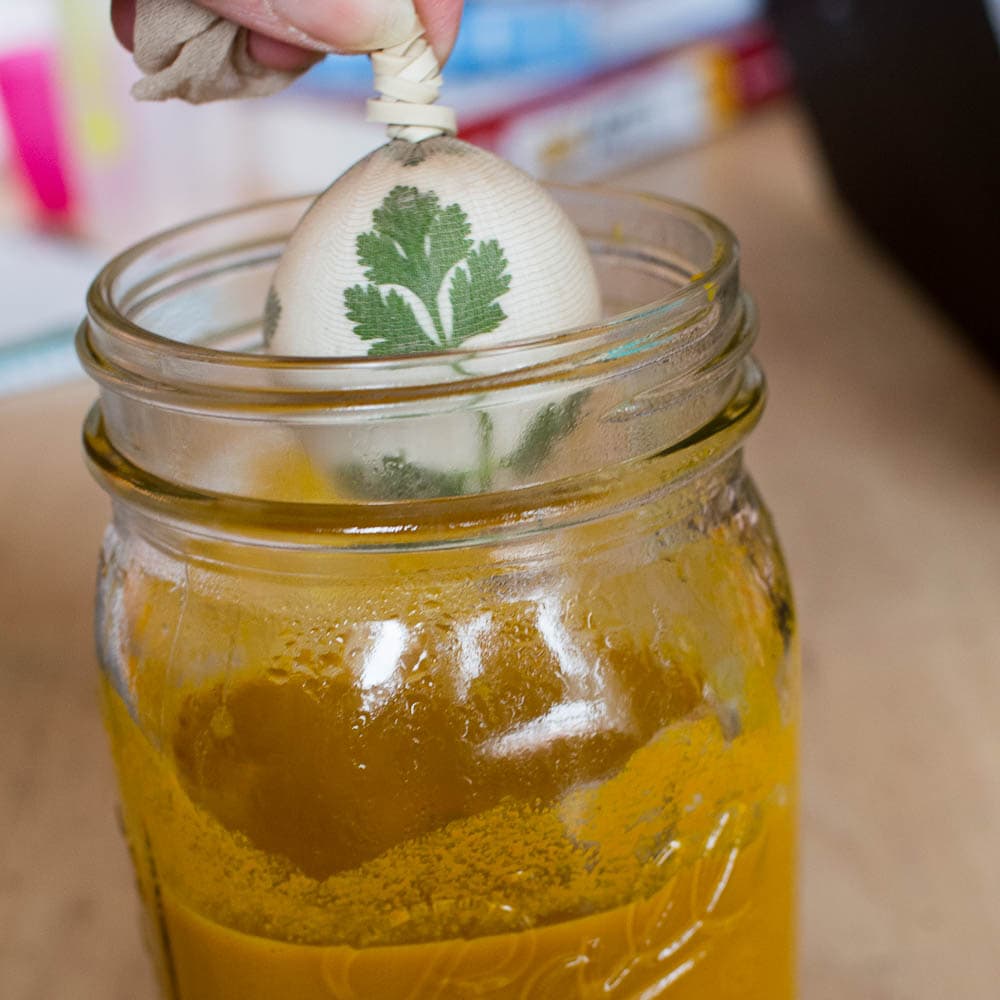
- Finally, I put the stockings into the mason jars of dye, and refrigerated them. I let the red cabbage eggs soak for 24 hours, and the turmeric ones for about 8 hours. Longer soaking would have given even deeper colors.
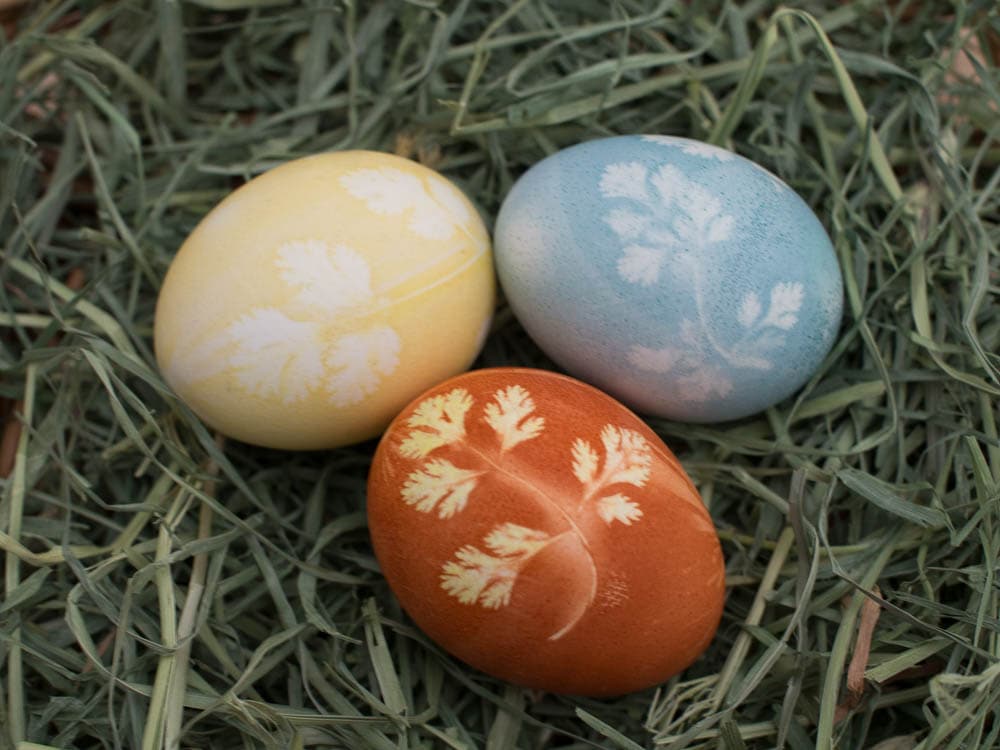
- Once they were done I cut off the stockings to reveal the pattern. The turmeric gives a pastel yellow color, while the red cabbage eggs are a pretty blue.
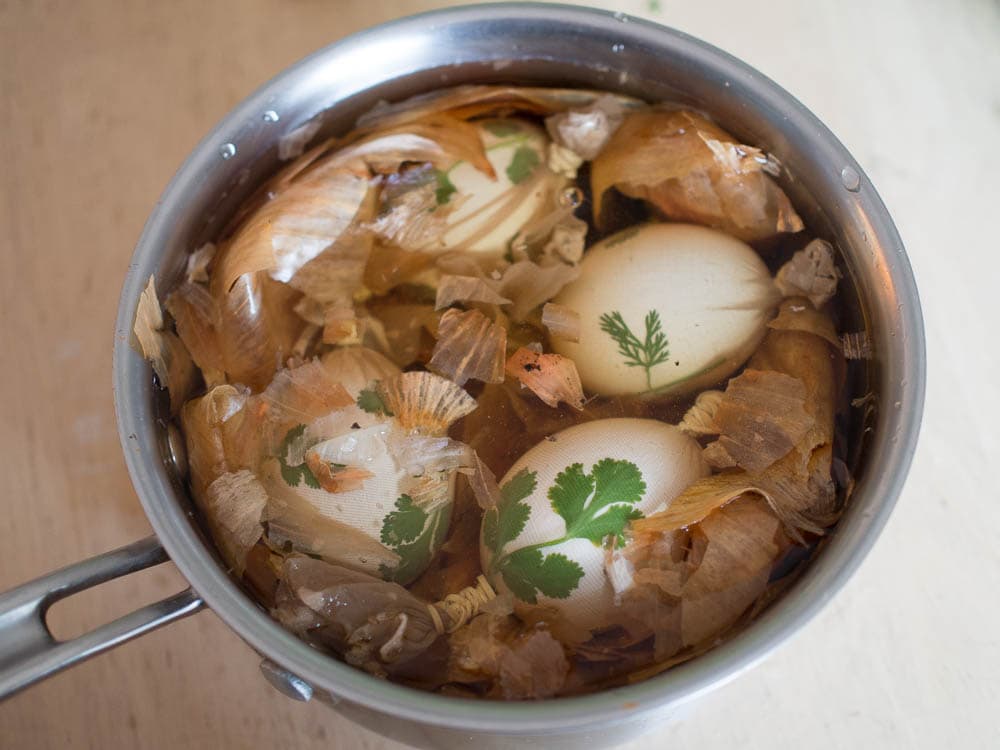
- The onion skin eggs were even easier to make, since I knew from experience that I could hard boil the eggs right in the dye water and get rich deep color fast.
- For this I prepared four raw eggs with herbs held in place by stockings.
- Then I put a cup or so of onion skins in a saucepan with 3 cups of water, and added the 4 raw eggs right to the pot. I added a tablespoon of vinegar, and boiled the eggs for 15 minutes, and then cooled them in a bowl of ice water, with the stocking still on.

- They came out a gorgeous deep orange color.

I love these eggs – they almost look too good to eat!


How beautiful! Will absolutely try this next year.
Coolest idea of the day! Love the creativity!
Cathy
I always thought it would be fun to let the kids pick something natural to dye the eggs with. Would they dye okay even if we didn’t let them sit for 8-24 hours? I know my kids wouldn’t be as patient as I am to wait for the beautiful natural colors.
What a very clever way to create beautiful Easter eggs. I pinned this and will be saving it for next year’s dyed eggs. I’ve come to visit from Foodie Friday. Happy Easter.
These are so amazing! I love the creativity an ingenuity you used to create the silhouette.
This is a lovely idea, never seen something like this. I need to try to make this at home =)
Thanks for linking up to Tasty Tuesday, I’ve pinned this great recipe to the Tasty Tuesday Pinterest board.