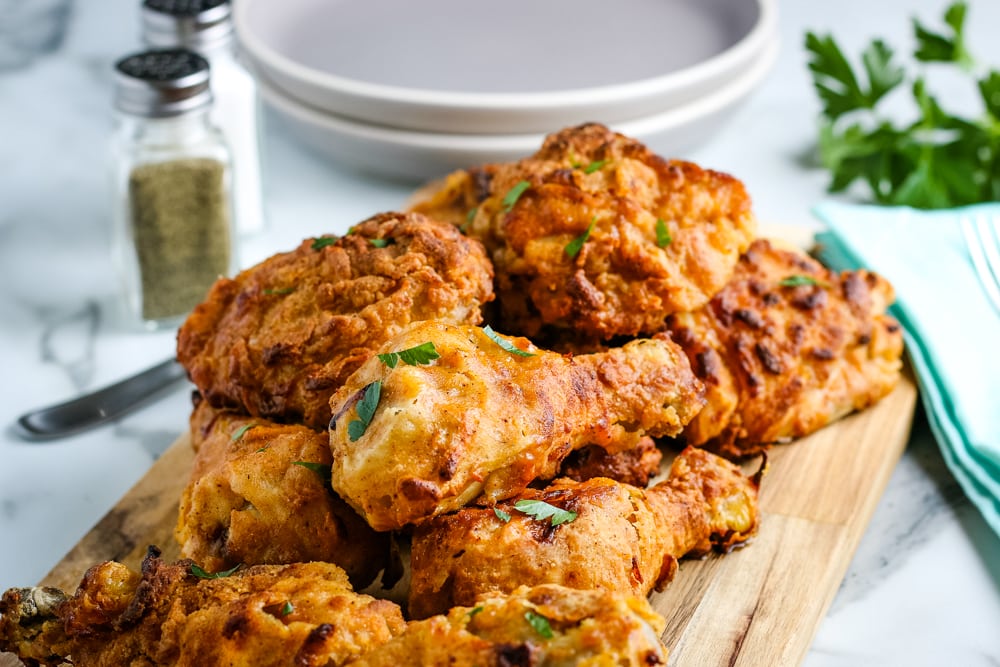
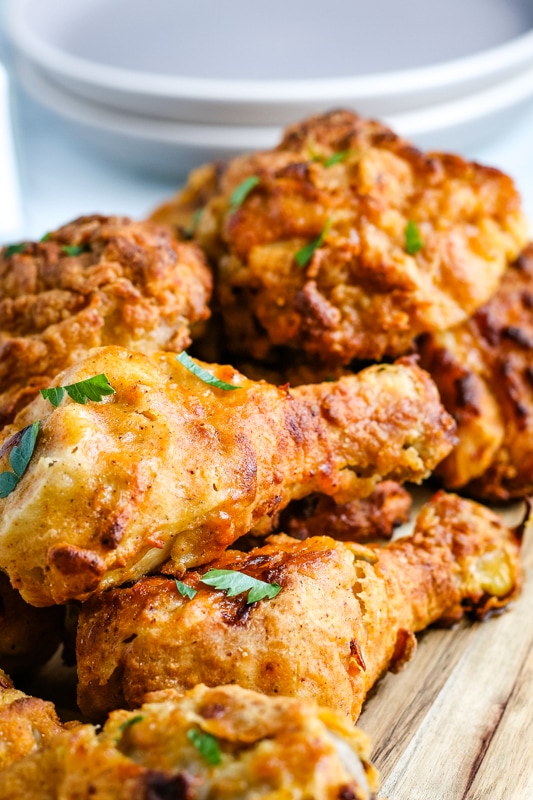
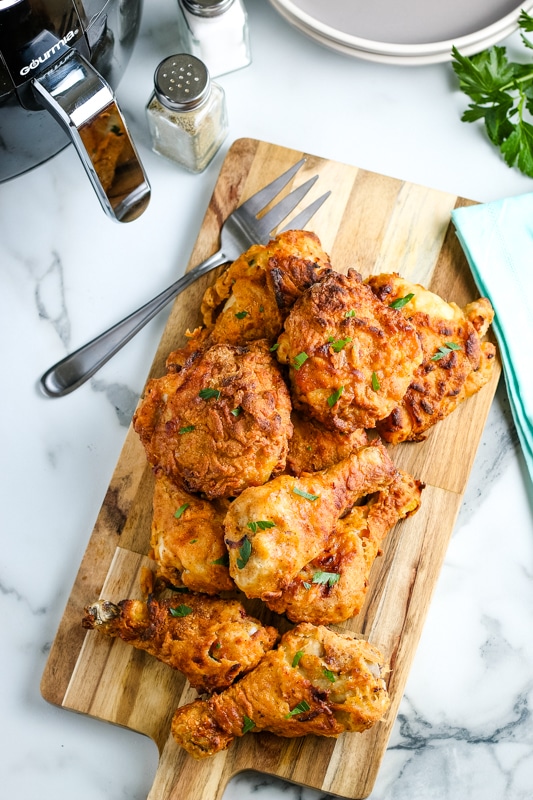
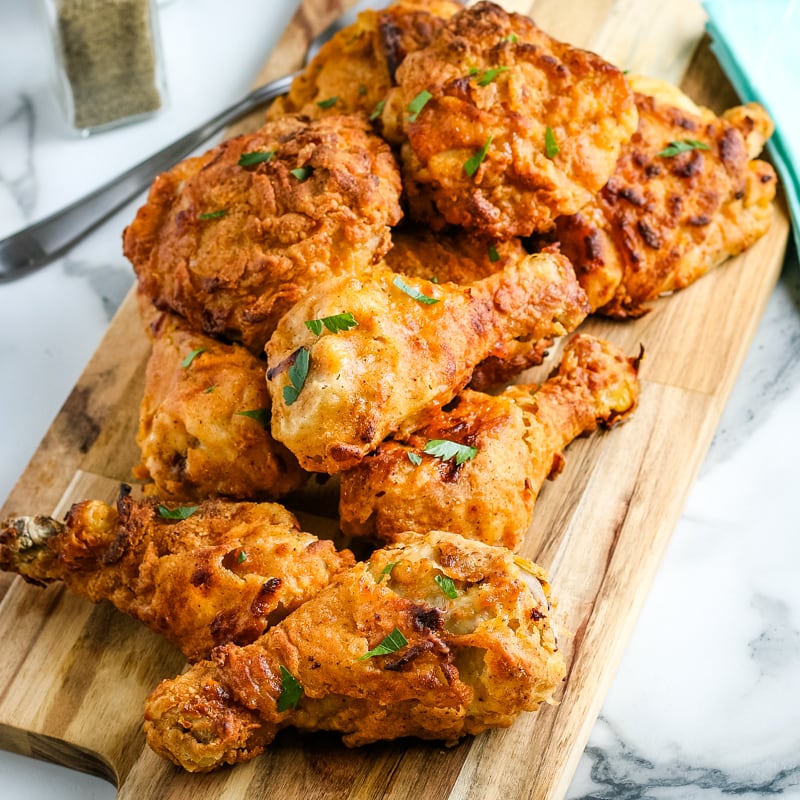
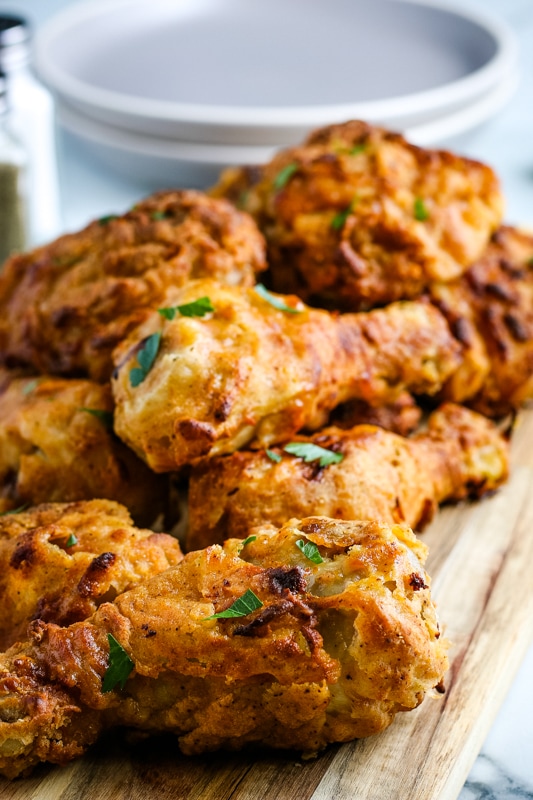
This air fryer fried chicken is delicious, tender and juicy on the inside with a crispy golden brown coating. Using your air fryer means you can enjoy crispy fried chicken at home with less grease and less mess!

Chicken is one of my favorite things to cook in my air fryer. The high heat of the air fryer means I can make healthy and juicy chicken quickly and easily!
I have shared my recipes for air fryer Nashville chicken and chicken breast with prosciutto before. This recipe is for simple, old fashioned fried chicken – sure to be a family favorite.
Advantages of Air Fried Fried Chicken
The biggest advantage of using an air fryer for fried chicken is that it uses much less oil. Using less oil means the chicken is better for you and has fewer calories.
Using less oil also makes cleanup much easier because it eliminates the need to mess around with large amounts of very oil. I’ve always felt deep fat frying is fine for restaurants, but not something I want to do at home.
Does Air Fried Chicken Taste Deep Fried?
This fried chicken recipe tastes delicious, but it is not going to taste exactly like deep fried! I don’t want anyone try this expecting it to be like KFC extra crispy chicken, because it won’t be.
Compare the deep fried chicken this recipe is less greasy and has a lighter coating of breading. I think this makes it taste better, because I don’t like greasy food.
What to Serve with Fried Chicken
In the past I have made my fried chicken the way my mom did, by baking it in the oven. And this air fryer fried chicken is much crispier and tastier than my oven baked fried chicken!
Ingredients
Here are the basic ingredients for making the fried chicken:
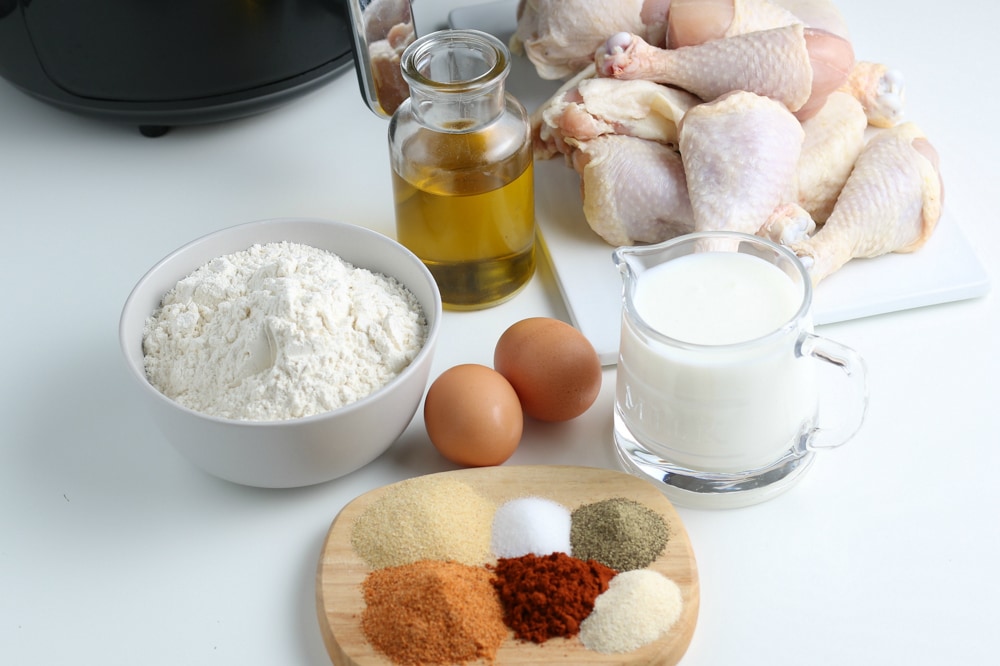
- Chicken thighs and legs – You could use chicken wings or chicken breasts if you prefer, although it would change the cooking time. Skin on chicken is best because it will be the crispiest.
- Buttermilk – If you don’t have buttermilk you can mix regular milk with a Tablespoon of vinegar per cup to create sour milk. The buttermilk or sour milk helps tenderize the chicken and keep it juicy.
- Eggs – The eggs help the flour stick to the chicken
- Flour – The flour provides most of the coating on the chicken.
- Oil – This recipe uses less oil, but not no oil. Oil in a spray bottle is essential.
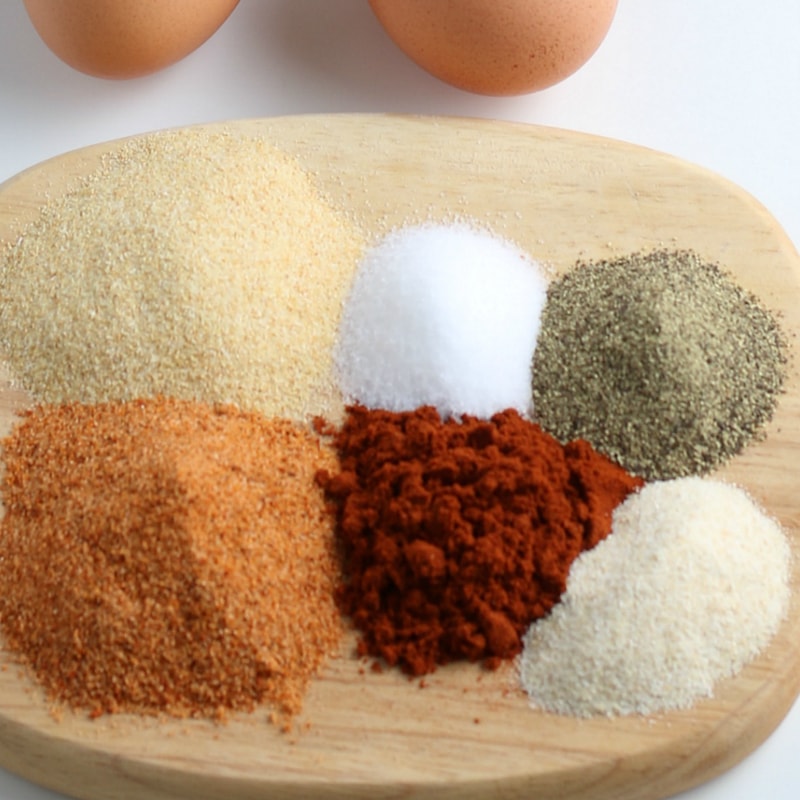
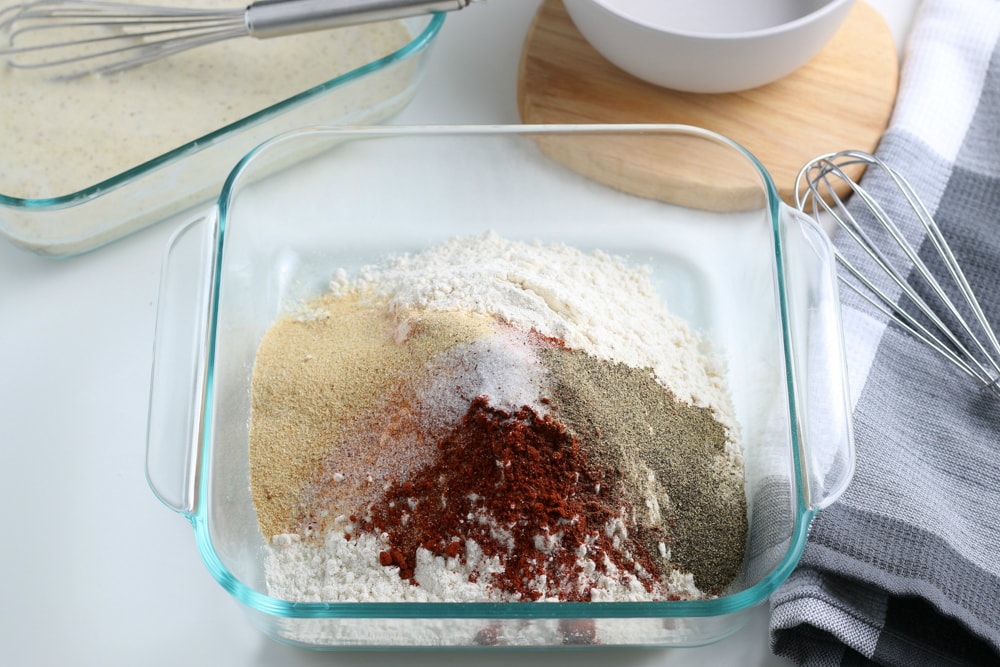
- Seasoning – The seasoning adds flavor to the flour coating. It is important to use a good amount of seasoning in the flour so your chicken isn’t bland. I seasoned this chicken with garlic powder, salt, pepper, paprika and onion powder.
What Kind of Oil?
I like to use vegetable or canola oil for this recipe. It is easiest if you have a spray bottle of oil, although you could also brush the oil on with a pastry brush.
In most air fryers it is not a great idea to use the aerosol cooking spray that you can buy at the grocery store. The chemicals in the oil can damage the nonstick finish that coats most air fryer baskets.
So the easiest thing to do is buy a small, inexpensive mister bottle and add your own oil to it. Then you can spray away at things in your air fryer basket without worrying about the finish.
Find More Air Fryer Recipes!
Step by Step Directions
This is a recipe with a bunch of steps, but it is very straight forward and easy to make!
1. Prep the Ingredients
Wash and dry the chicken. Make sure it is very dry so that the coatings stick well.
In a large bowl or pan mix together the buttermilk, eggs, salt and pepper. Make sure the container is big enough to dip the chicken pieces into.

In another large container combine all the coating ingredients. This includes the flour, garlic powder, seasoned salt, paprika, onion powder, black pepper and salt.
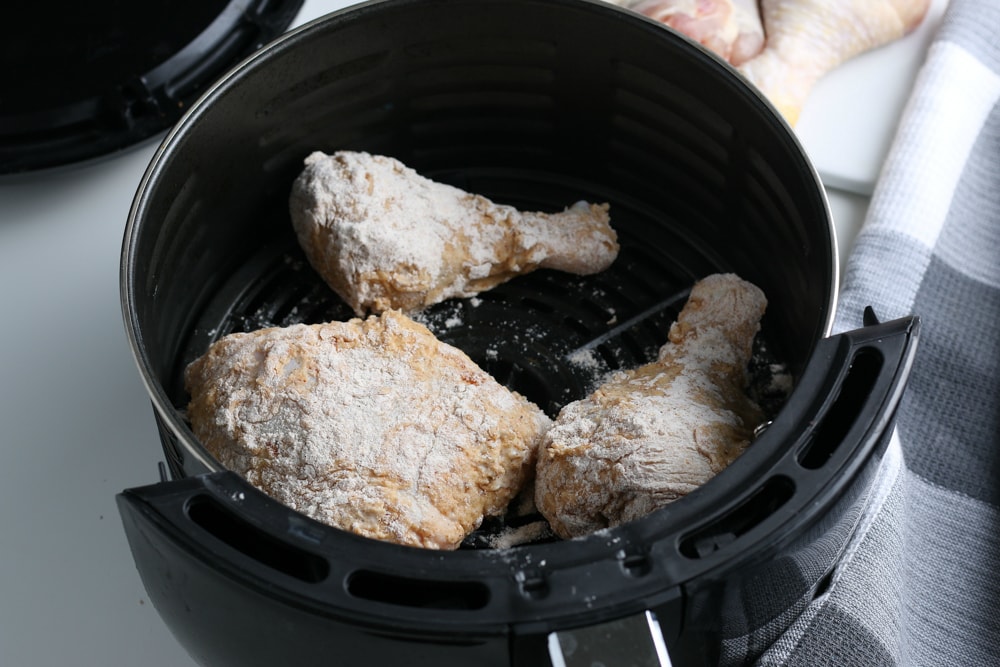
Before you start dipping the chicken spray the bottom of the air fryer basket with a little bit of oil so the chicken won’t stick to the bottom.
2. Dip the Chicken
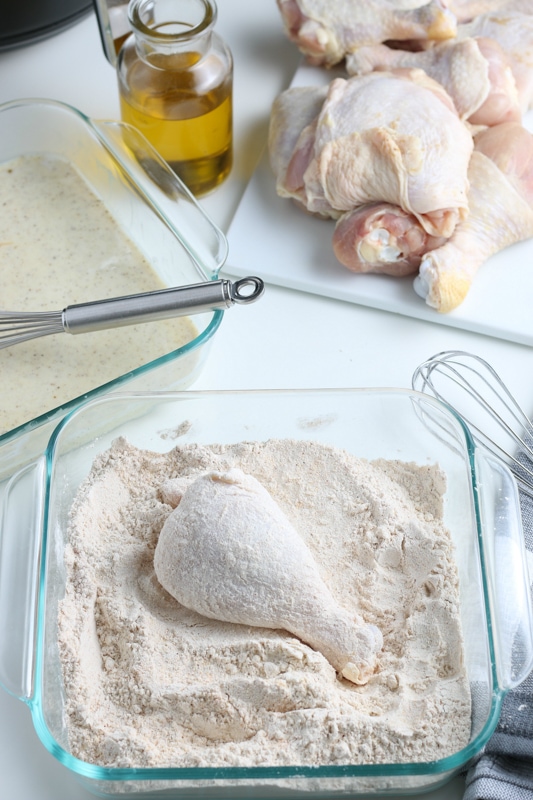
Take one chicken piece at a time. Dip it into the flour mixture, then shake off any excess.
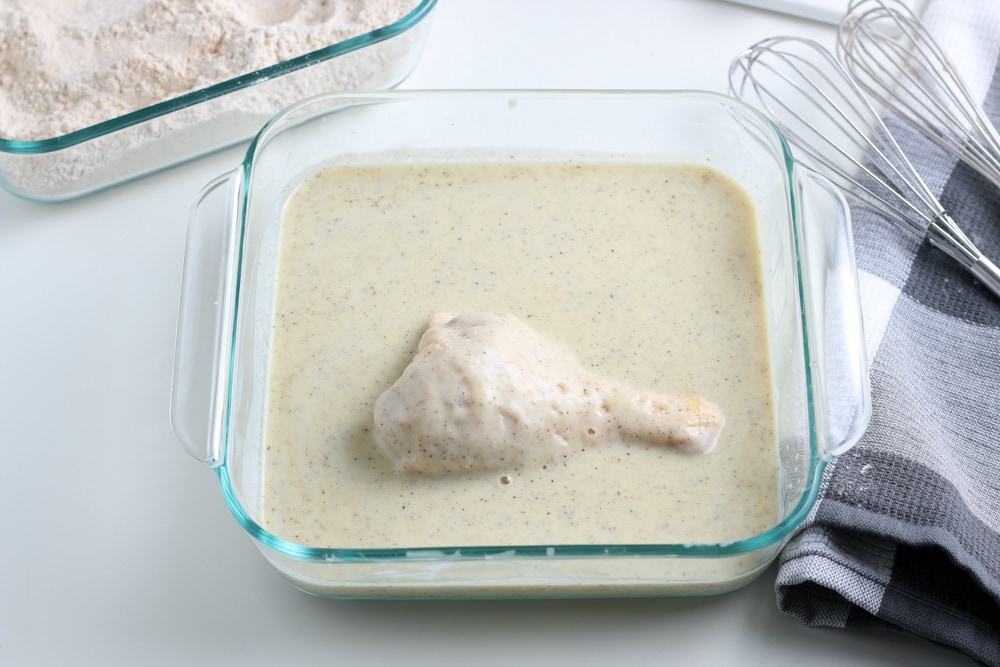
Dip the mixture into the buttermilk and let it drip so any extra buttermilk goes back in the bowl.
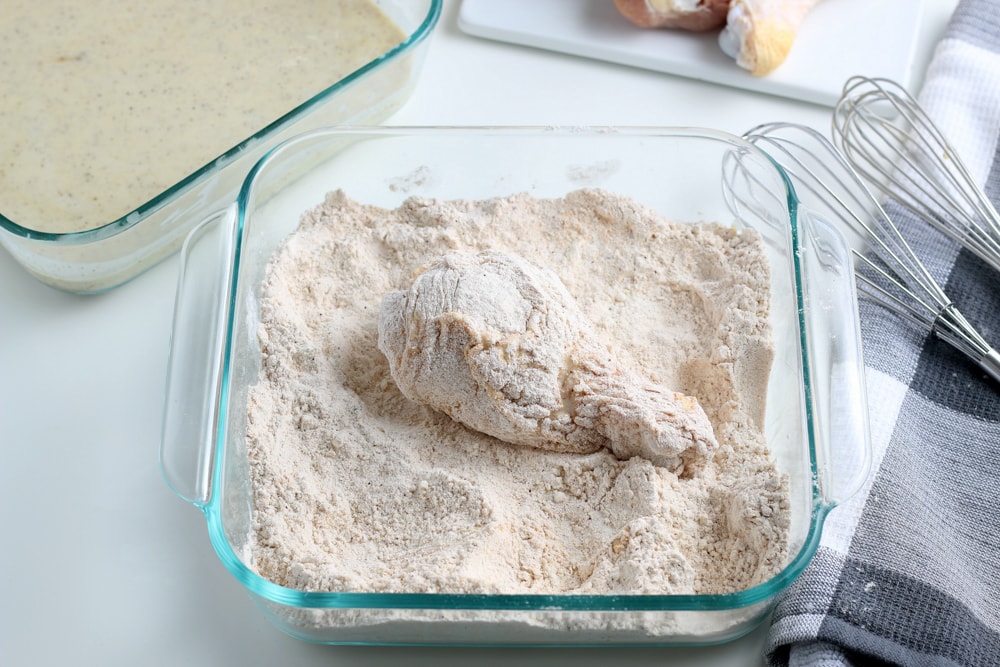
Finally dip the chicken piece back into the flour mixture. Shake off an excess flour and place the chicken in the air fryer basket. You only need a thin coating of breading, don’t add too much.
Repeat until the air fryer basket is full. Do not over crowd the basket and do not stack the chicken so that there is room for the air to circulate.
You will likely have to make a couple batch of chicken, depending on the size of your air fryer.
3. Cook the Chicken
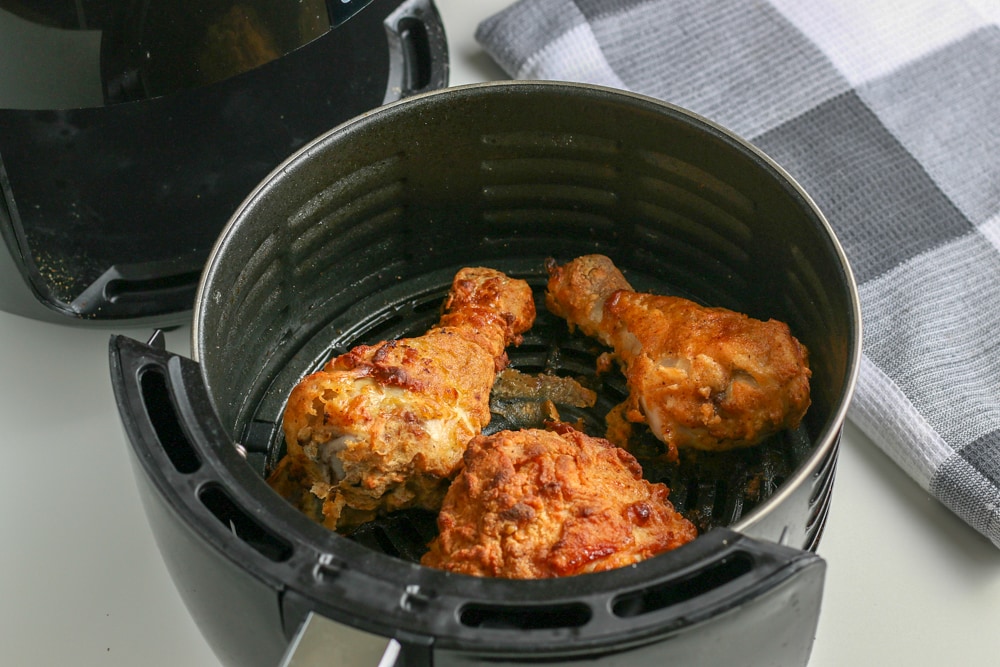
Once you have filled your air fryer basket spray the chicken with oil. Then set the air fryer on 370 F and cook the chicken for 15-20 minutes.
Open the air fryer and check the chicken. If you can see spots of flour spray those spots with more oil.
Then use tongs to flip over the chicken. Spray the other side of the chicken with a little bit of oil.
Air fry the chicken for another 5-10 minutes, until it is golden brown. Check the internal temperature of the chicken with an instant read thermometer. It should reach at least 185 F for legs and thighs and 165 F for chicken breasts.
Always use a meat thermometer to check the internal temperature, don’t try to cook based just on time. A thermometer is not expensive and the peace of mind they give you is priceless. Food poisoning is not fun! This is my favorite inexpensive meat thermometer, which you can buy on Amazon.
Repeat as needed to cook the rest of your chicken. Since the air fryer will be hot the second batch will probably cook 2-3 minutes more quickly. And cooking times will vary between air fryers, so keep a close watch on the chicken and adjust your time if needed.
How is this Different from Nashville Chicken?
I also have a recipe for air fryer Nashville chicken, which is also a type of fried chicken. The Nashville chicken recipe is similar, but more complicated to make.
Making spicy Nashville fried chicken involves marinating the chicken in a buttermilk and hot sauce mixture and letting it air dry after dipping. So it gives you a nice spicy and crispy chicken dinner, but it takes more time.
So for a weeknight chicken dinner that I can have on the table in under an hour this is my go to recipe!
How to Serve
This air fryer chicken is golden brown and crispy outside and nice and juicy on the inside. The chicken will taste best when you serve it right away. Because it is cooked with less oil it won’t stay crispy as long as deep fried chicken.
I like to serve fried chicken with a side dish that I can make ahead of time, like blue cheese coleslaw or potato salad. That way I’m not trying to make a side dish while I’m dipping chicken.
How to Store
If you have leftover chicken you can store it in an air tight container in the refrigerator for 2-3 days. The leftovers are good cold, although they won’t be as crispy.
It works best not to reheat this chicken in the air fryer, because the outer coating is likely to burn. If you want to eat the leftovers hot put the chicken a tray in the oven at 300 F for about 20 minutes.
Find More Air Fryer Dinner Ideas

Air Fryer Fried Chicken
inside with a crispy golden brown coating.
Ingredients
- 2 pounds skin on chicken legs and thighs
- 2 cups buttermilk
- 2 large eggs
- 1 teaspoon salt
- 1 teaspoon black pepper
- oil for spraying
Coating
- 2 cups flour
- 1 Tablespoon garlic powder
- 1 Tablespoon seasoned salt
- 1 1/2 teaspoon paprika
- 1 teaspoon onion powder
- 1 teaspoon black pepper
- 1 teaspoon salt
Instructions
- Wash and dry chicken pieces.2 pounds skin on chicken
- In a large bowl mix together the buttermilk, eggs, salt and pepper.2 cups buttermilk, 2 large eggs, 1 teaspoon salt, 1 teaspoon black pepper
- In another large bowl mix together the flour, garlic powder, seasoned salt, paprika, onion powder, black pepper and salt.2 cups flour, 1 Tablespoon garlic powder, 1 Tablespoon seasoned salt, 1 1/2 teaspoon paprika, 1 teaspoon onion powder, 1 teaspoon black pepper, 1 teaspoon salt
- Spray the air fryer basket with a little bit of oil to prevent the chicken from sticking to the bottom.oil for spraying
- Dip a chicken piece into the flour mixture. Tap off any excess flour.
- Dip the piece into the buttermilk mixture. Let excess buttermilk drip back into the bowl.
- Dip the chicken into the flour again. A light coating of flour is best.
- Put the chicken in the air fryer basket. Then repeat steps 5-8 until the basket is full. Do not stack the chicken and make sure there is room for the air to circulate.
- Spray the chicken with oil to coat the topside.
- Air fry the chicken at 370 F for 15-20 minutes.
- Check the chicken. If there is any visible flour on the chicken spray it with a little more oil.
- Then flip the chicken with tongs and spray it with more oil.
- Cook for another 5-10 minutes, until it is golden brown.
- Test the temperature with an instant read thermometer and make sure it has reached 185 F for legs and thighs or 165 F for chicken breasts.
- Once the chicken is done make another batch if necessary.
Notes
- Air fryers vary, so you might have to adjust the cooking time. Keep a close watch on the chicken the first time you make it and adjust as needed.
- You can use chicken breasts, although you might need to adjust the cooking time.
- It is better not to use commercial cooking spray in an air fryer because it can damage the non stick coating that most air fryer baskets have. Use a mister spray bottle or brush the oil on the chicken.
As an Amazon Associate and member of other affiliate programs, I earn from qualifying purchases.
Nutrition Information
Nutrition facts are estimates.

Just tried this recipe and the coating kept falling off the chicken as it cooked and as I turned it. Any recommendations?
I’m not the author of this recipe obviously but I have had that problem before with a recipe like this! For starters make sure you first dip the chicken in the flour before the buttermilk mixture. Secondly I found after you have finished breading the chicken, if you put them on a sheet pan and let them rest for 30 min to an hour in the fridge, the breading sticks much better. Also- generously spray the air fryer basket or line it with foil if you can so it doesn’t stick and come apart when you attempt to turn or remove them. Good luck 🙂
I followed your recipe and it turned out prefect!
Just made this and it turned out way better than I expected. Will be using this recipe more in the future. Thanks for sharing.
What is the best air fryer for one person frying chicken..
Flour is missing in the list of ingredients but indicated in the instructions. But how much flour should one use?
It is 2 cups of flour, it is in the coating section.