This shop has been compensated by Collective Bias, Inc. and its advertiser. All opinions are mine alone. #WhereFunBegins #CollectiveBias
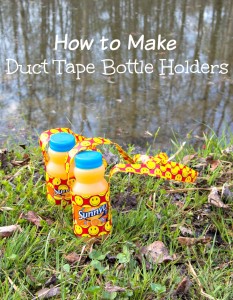
With summer approaching my family and I are getting ready for lots of summer fun! We love enjoying the outdoors, whether we are out in a boat, canoeing or hiking in a forest. Luckily, there are many parks and outdoor areas near us so we can explore nature. This weekend we set out for some early summer fun at a local park, and to make our day more enjoyable, we took along some SunnyD in a handy duct tape carrier.

The big activity this weekend was finding frogs, toads and tadpoles – one of my kids’ favorite spring adventures. Frequently the frogs and toads are too fast for us, but once in a while we are successful.