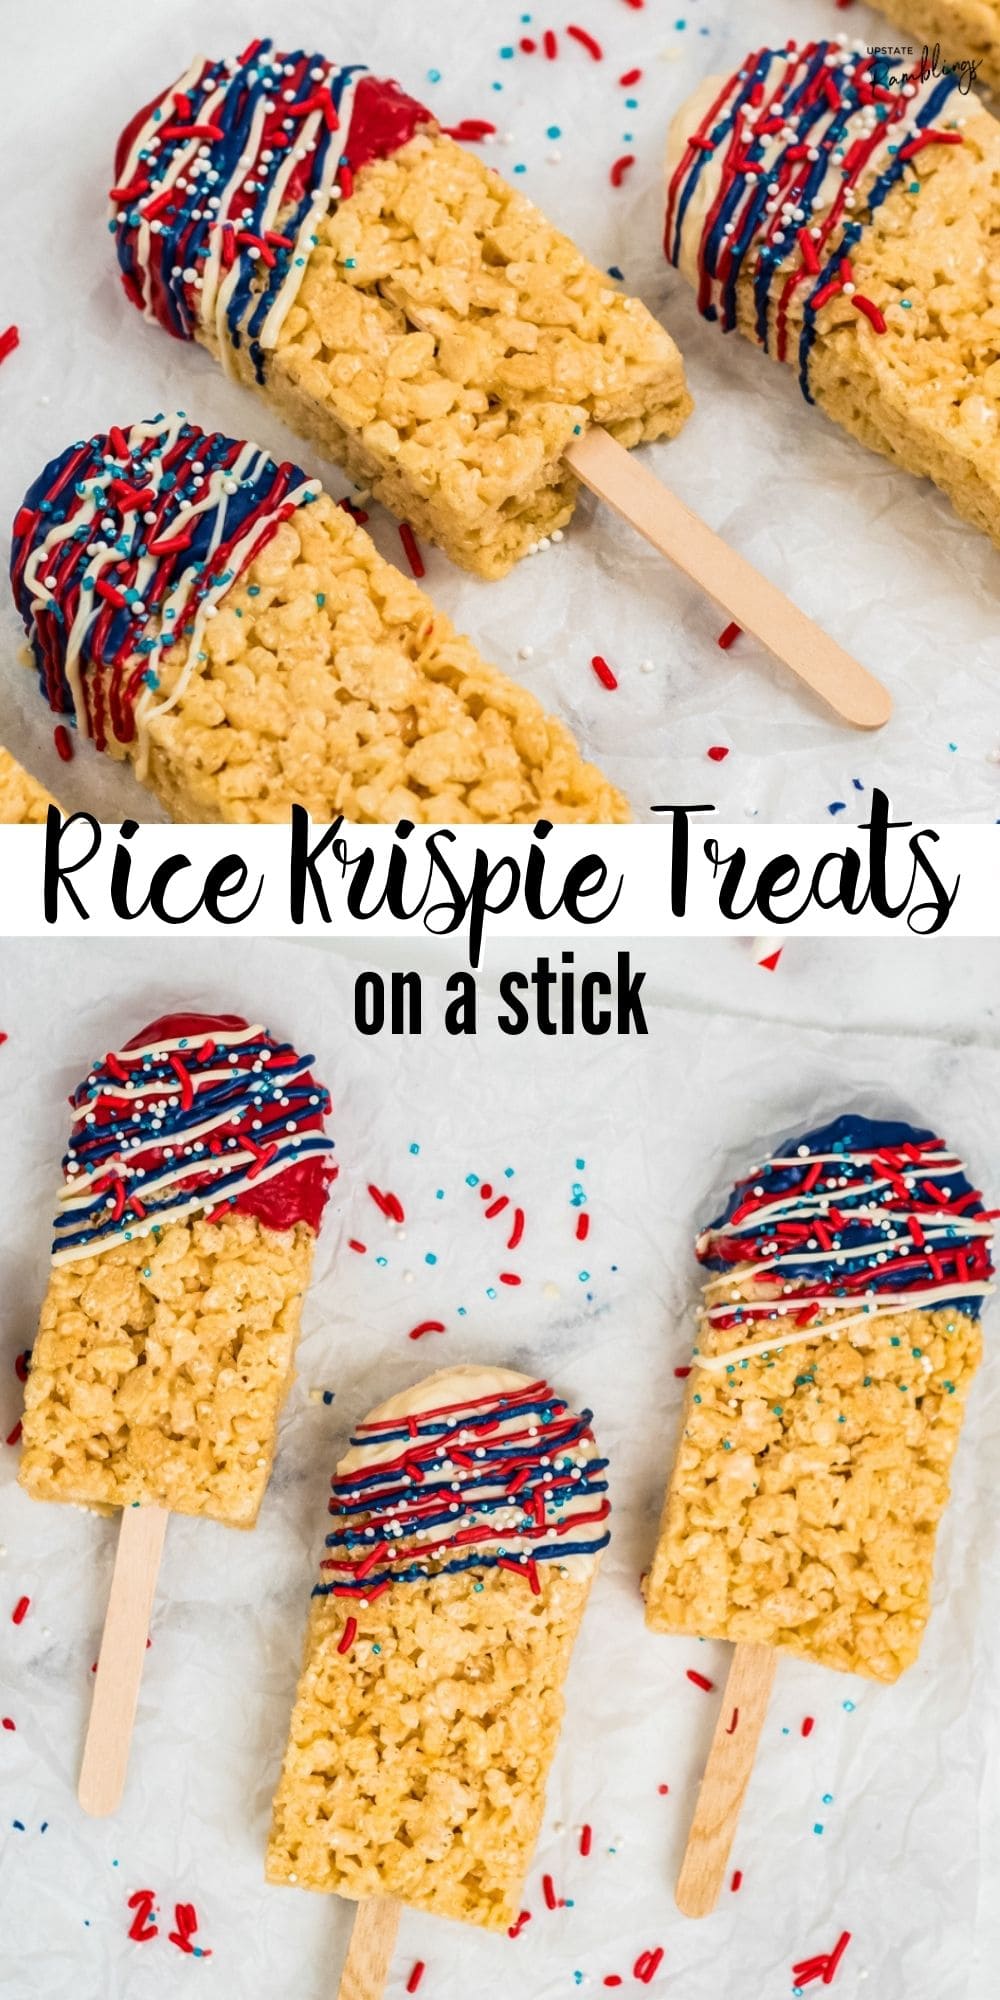
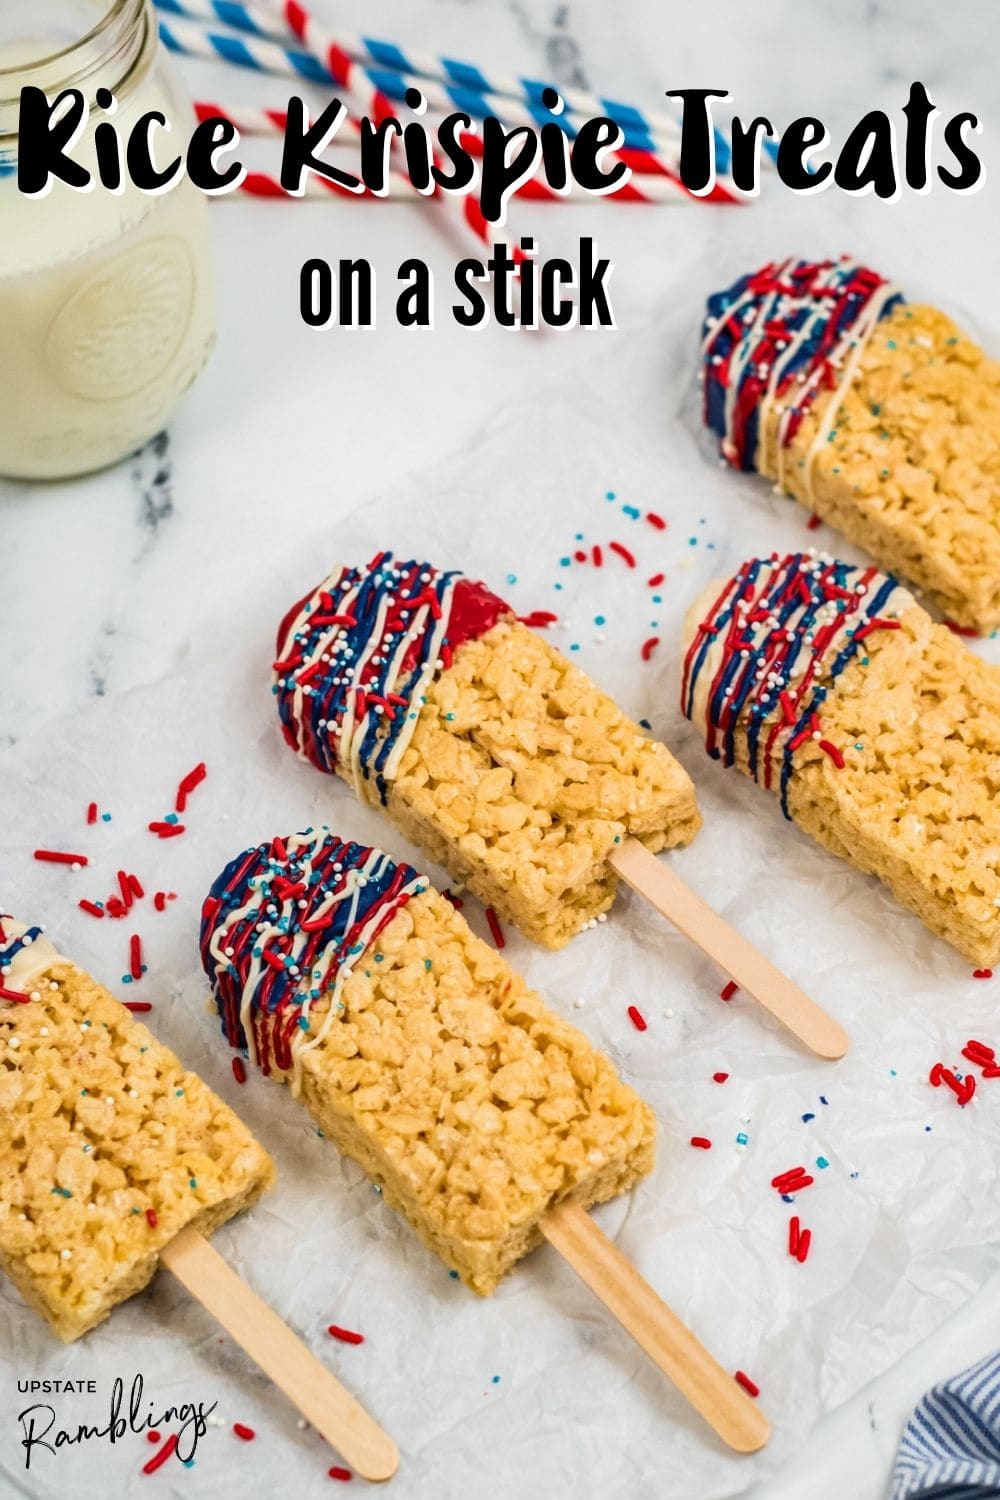
These fun and festive Rice Krispie treats on a stick are simple to make! Chocolate covered Rice Krispie treats are turned into popsicles and decorated for a dessert everyone will love to make and eat. Decorate with red, white and blue for a summer cookout.
Rice Krispie treats are one of the simplest desserts you can make and one of my kids’ favorites. They are crispy, sweet and a little bit gooey and addictive to eat.
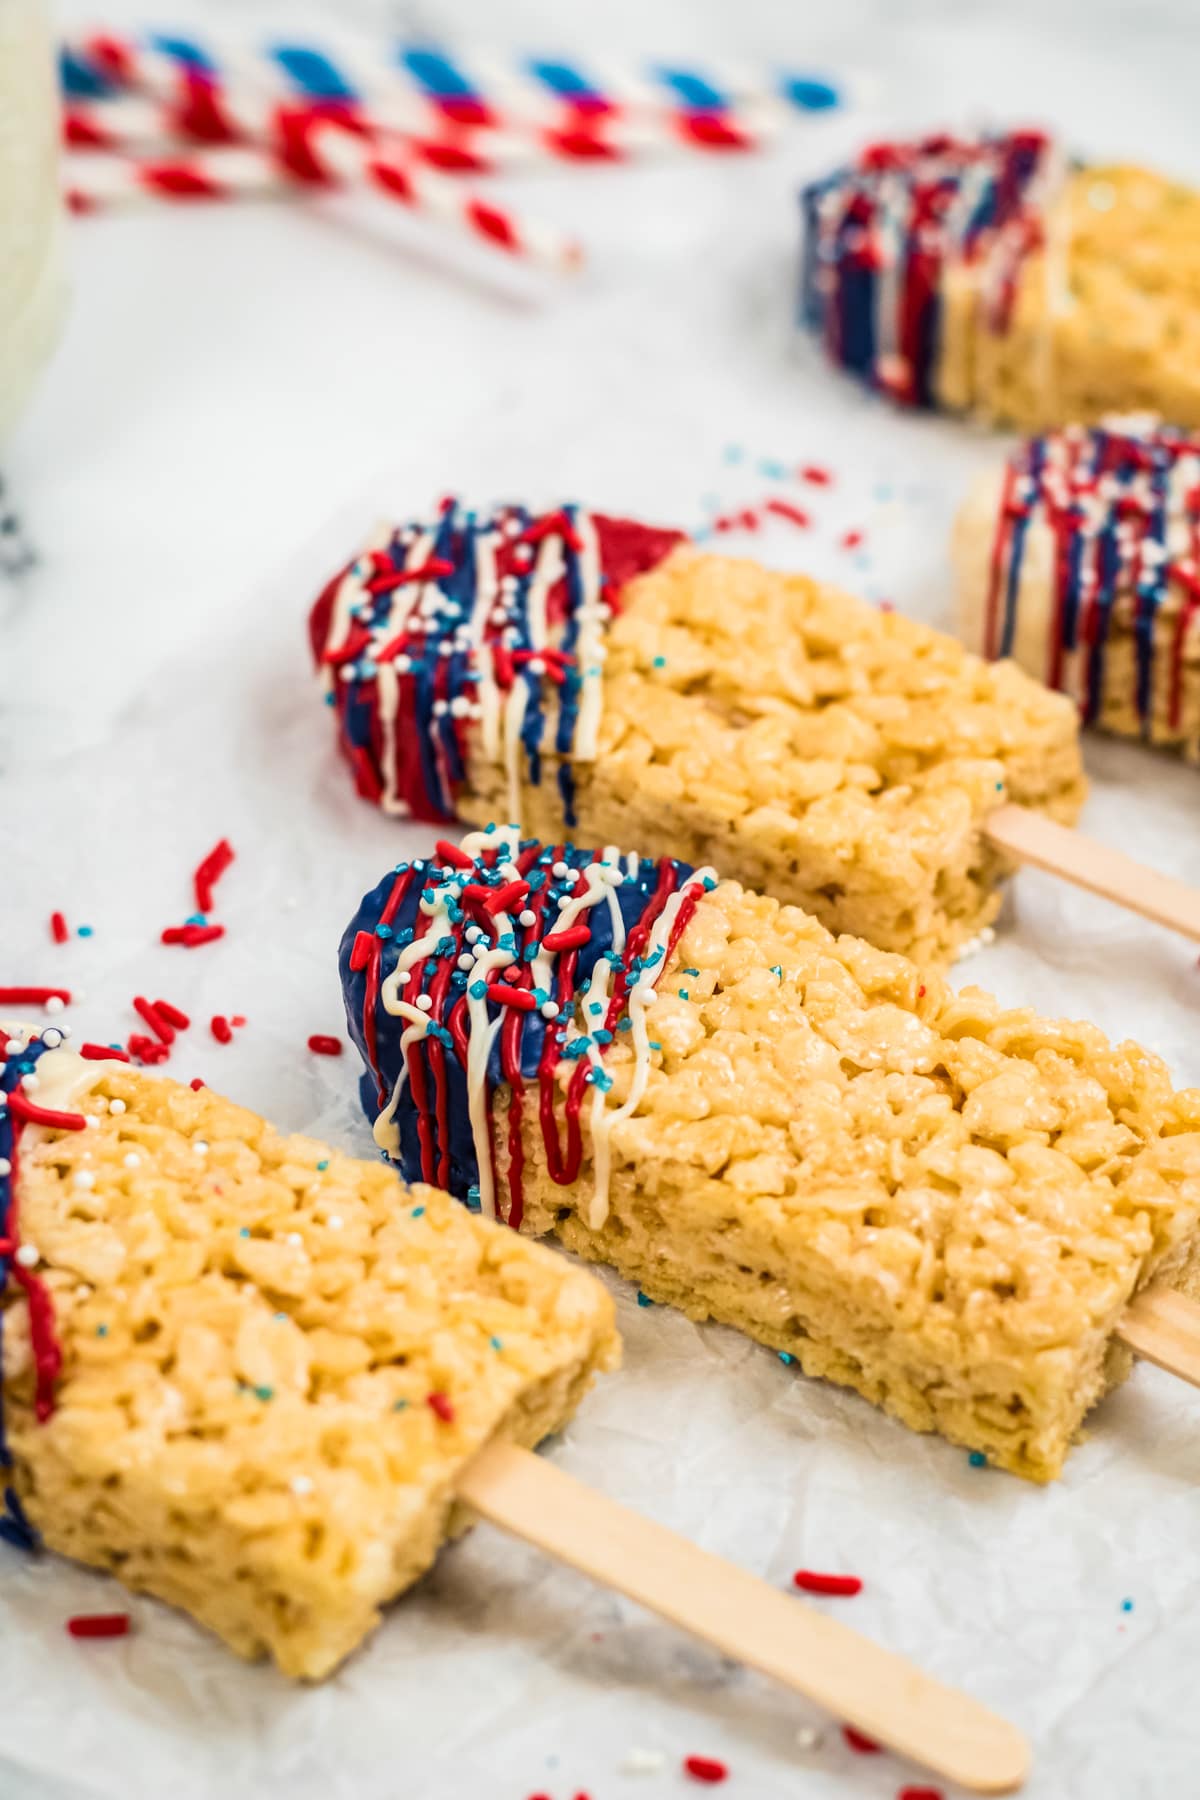
And what better way to make them even more delicious than by dipping them in chocolate and turning them into chocolate Rice Krispie pops! I use colored candy melts to make Rice Krispie treats into a patriotic red, white and blue treats on a stick.
And the beauty of this recipe is you don’t have to stick to my color scheme, you can make these with your favorite colors and sprinkles. That makes this an easy dessert you can customize for any occasion.
Looking for more red, white and blue dessert ideas for a patriotic dessert this summer? Check out my mini cheesecake parfaits, these gorgeous 4th of July cupcakes or Red, White and Blue Popsicles.
Why You Will Love Rice Krispie Treats on a Stick
- These no bake treats are fun for kids to make and decorate.
- Putting these cereal treats on a stick makes them easier to eat and means there are no sticky fingers.
- Rice Krispie treats on a stick are portable, so they are perfect for taking to a picnic or summer gathering, like a Memorial Day or 4th of July cookout.
- It takes no talent or skill at decorating to make this simple dessert look awesome. Forget fussy decorating, just drizzle chocolate everywhere and randomly toss sprinkles on them.
Fun For Kids to Make
These chocolate covered Rice Krispie treats are a lot of fun for kids to make and eat. Decorating these could be a fun activity for a birthday party!
Make the treats ahead of time and let the kids get busy adding as much coating and sprinkles as they like. Just make sure you plan on a mess!
Key Ingredients
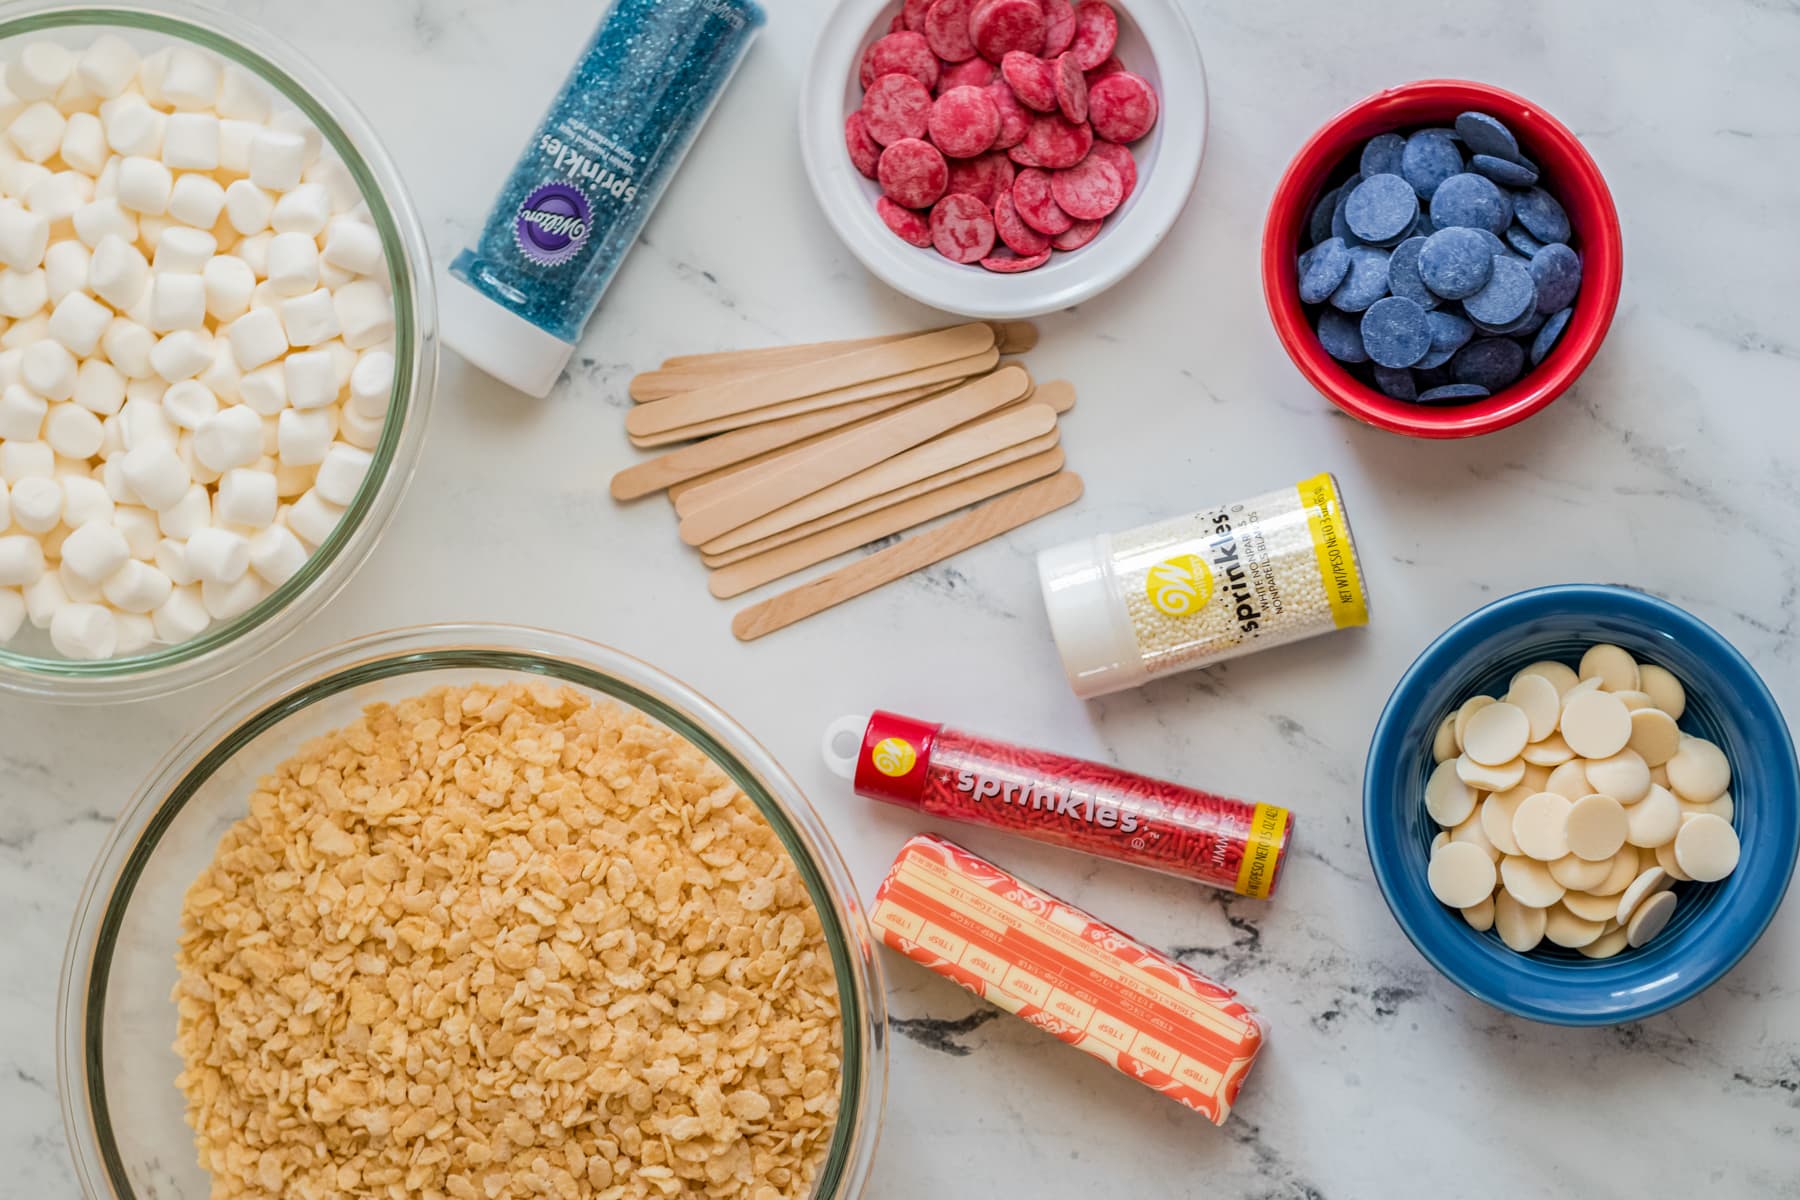
- Rice Krispies Cereal – Make sure you have fresh cereal, don’t make the mistake of using a box that has been sitting in the pantry for weeks, because it does go stale.
- Marshmallows – I prefer to use mini marshmallows when I make Rice Krispie treats, but regular size marshmallows work too.
- Butter – Either salted or unsalted works.
- Candy melts – You can use any kind of chocolate to coat these Rice Krispie popsicles. I like to use candy melts because they are simple to use and come in an amazing variety of colors. Chocolate chips work too. This is supposed to be a easy dessert, so tempering chocolate seems like way too much effort to me.
- Sprinkles
- Popsicle sticks or cake pop sticks – Use food grade popsicle sticks, don’t just grab your kids craft sticks!
Step by Step Instructions
1. Make the Treats
Line a baking sheet with parchment paper or waxed paper. A quarter sheet baking pan is about 13″ x 9″ which is a good size for the recipe.
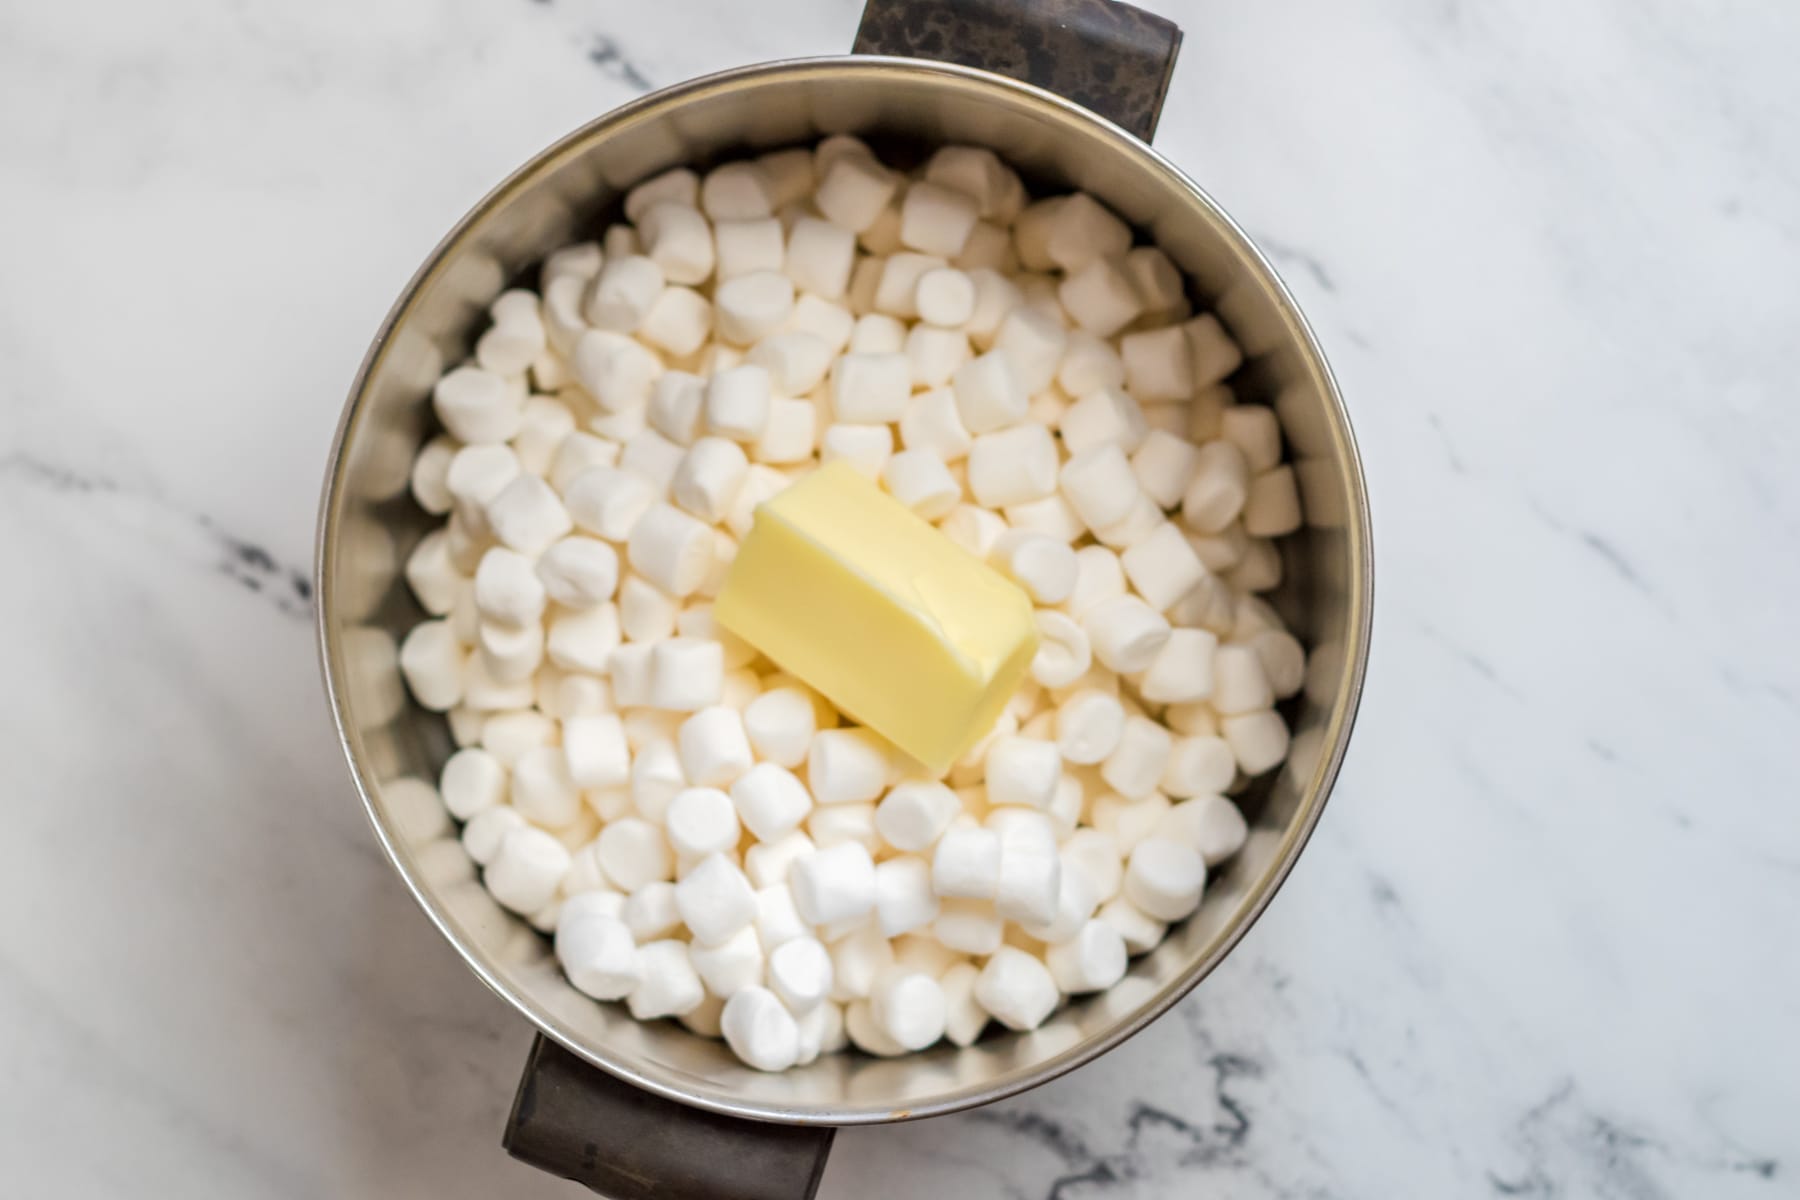
Put the marshmallows and butter in large pan and heat them, stirring, over medium heat until the mixture is melted and smooth. Stir constantly as it melts.
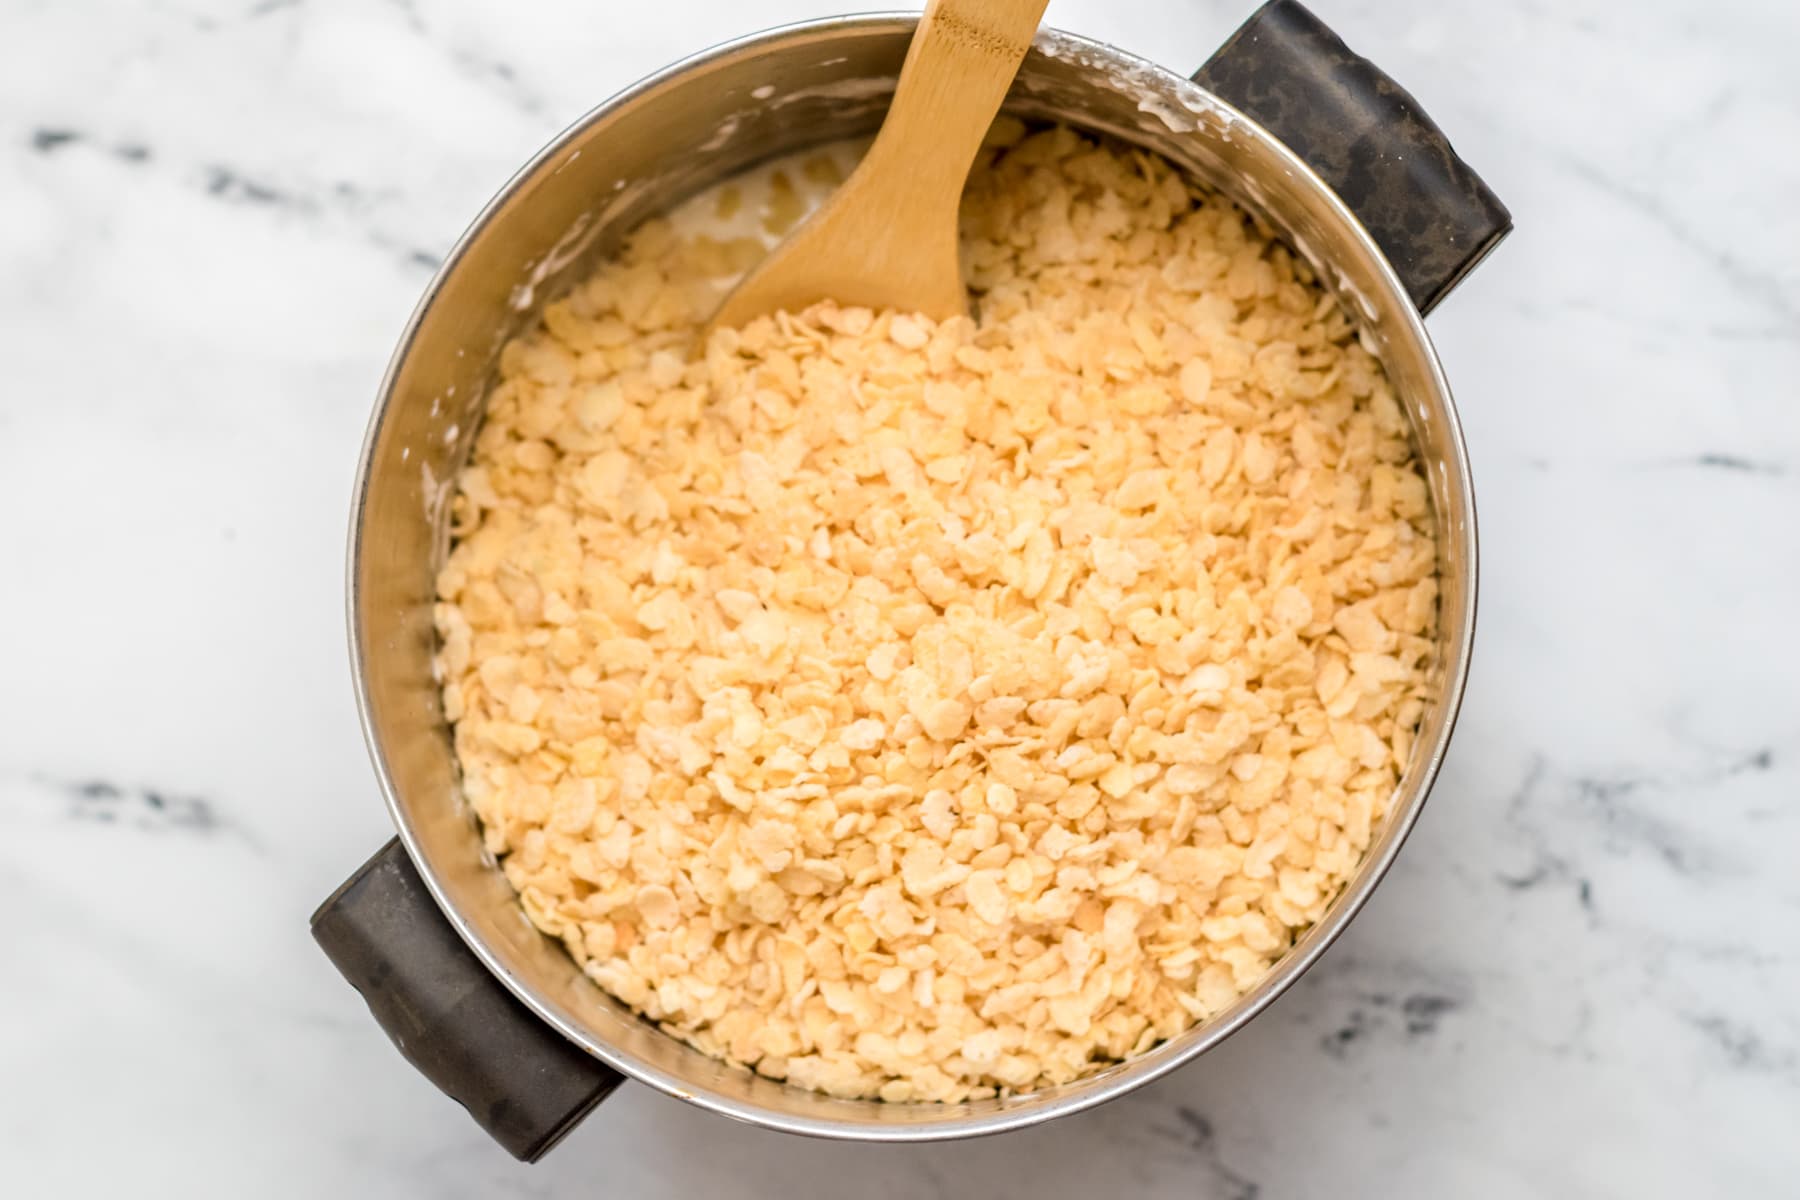
Take the pan off the heat and add the Rice Krispies to the pan. Stir them so the cereal is evenly coated in the marshmallow mixture.
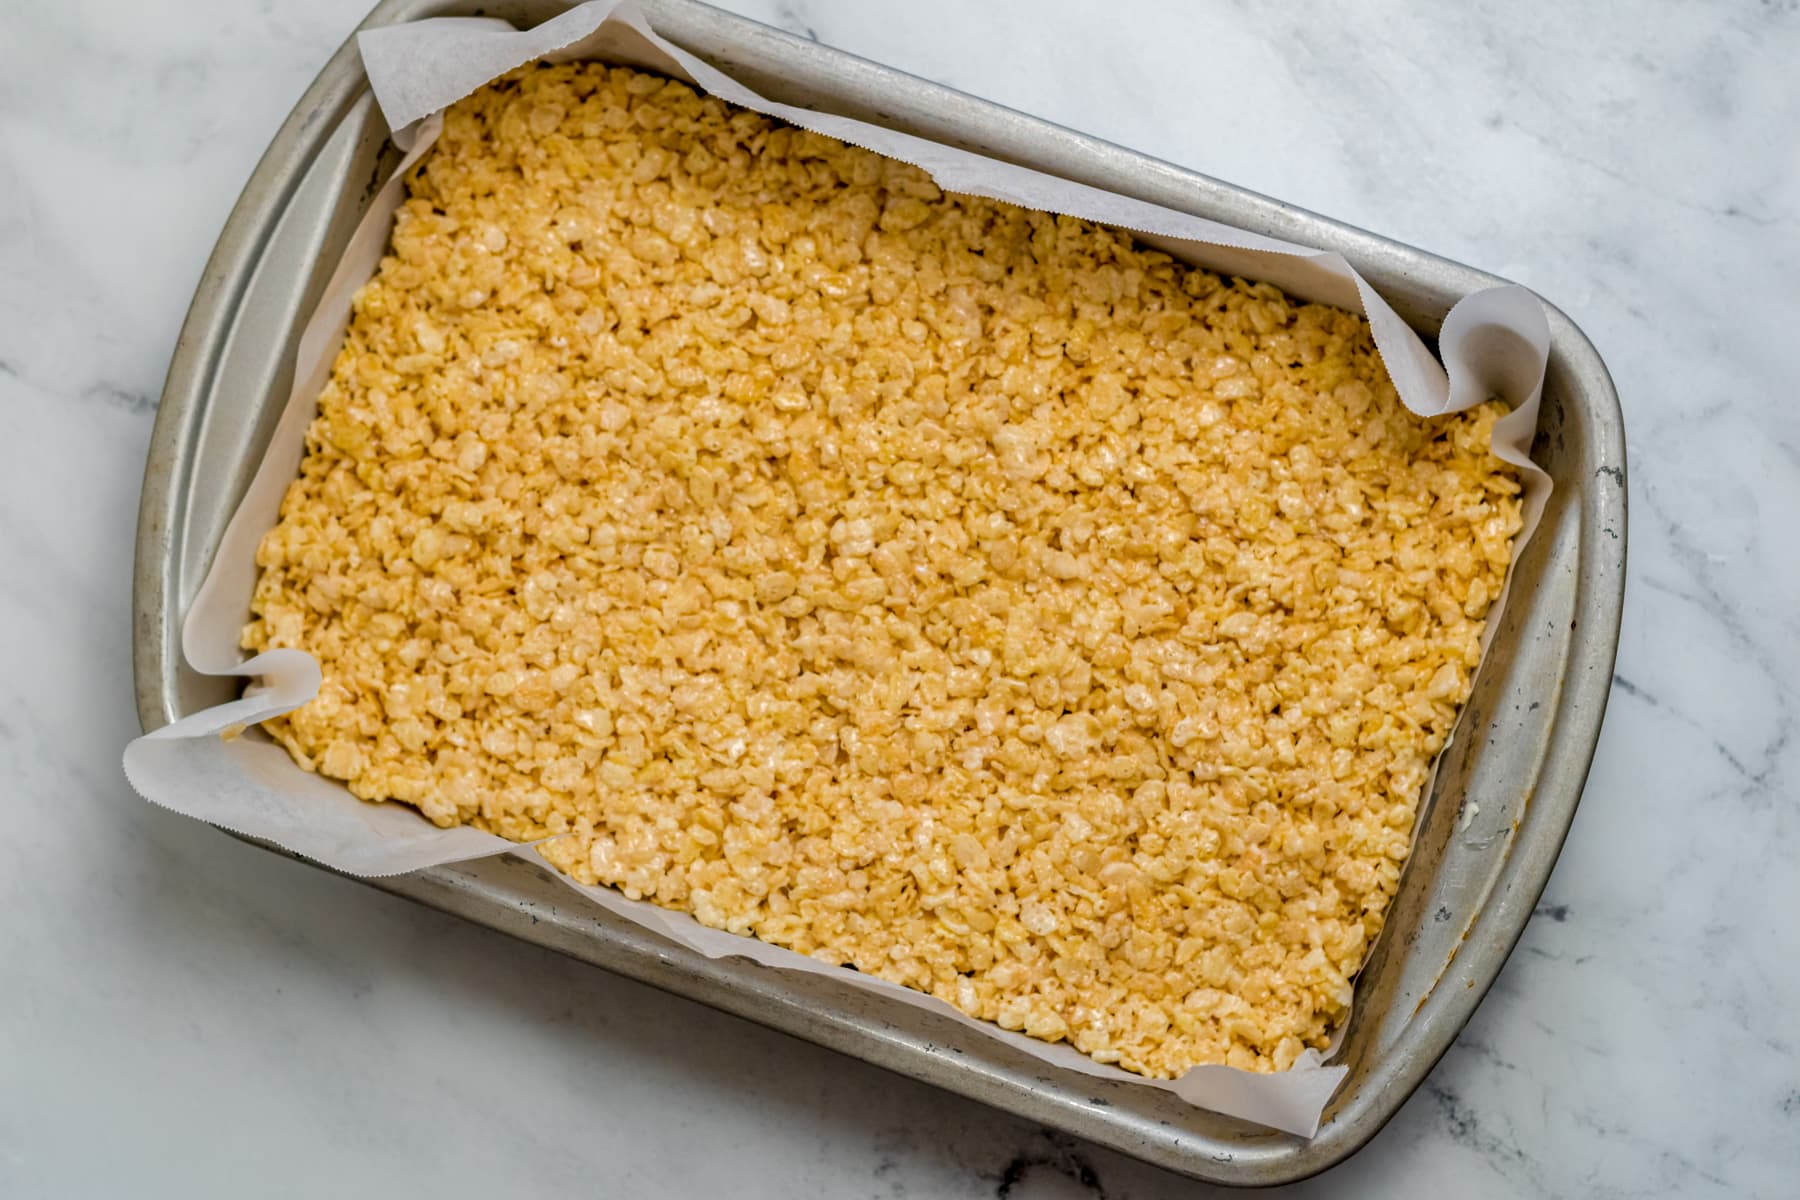
Working quickly spread the cereal into the prepared baking sheet and press it down gently. I like to use a spatula to flatten the top. Let it cool completely, which takes only 15-20 minutes.
2. Make Popsicles
These treats are more fun it you make them into popsicle shapes! To do this lift the treats out of the baking sheet using the waxed paper and put them on a cutting board.
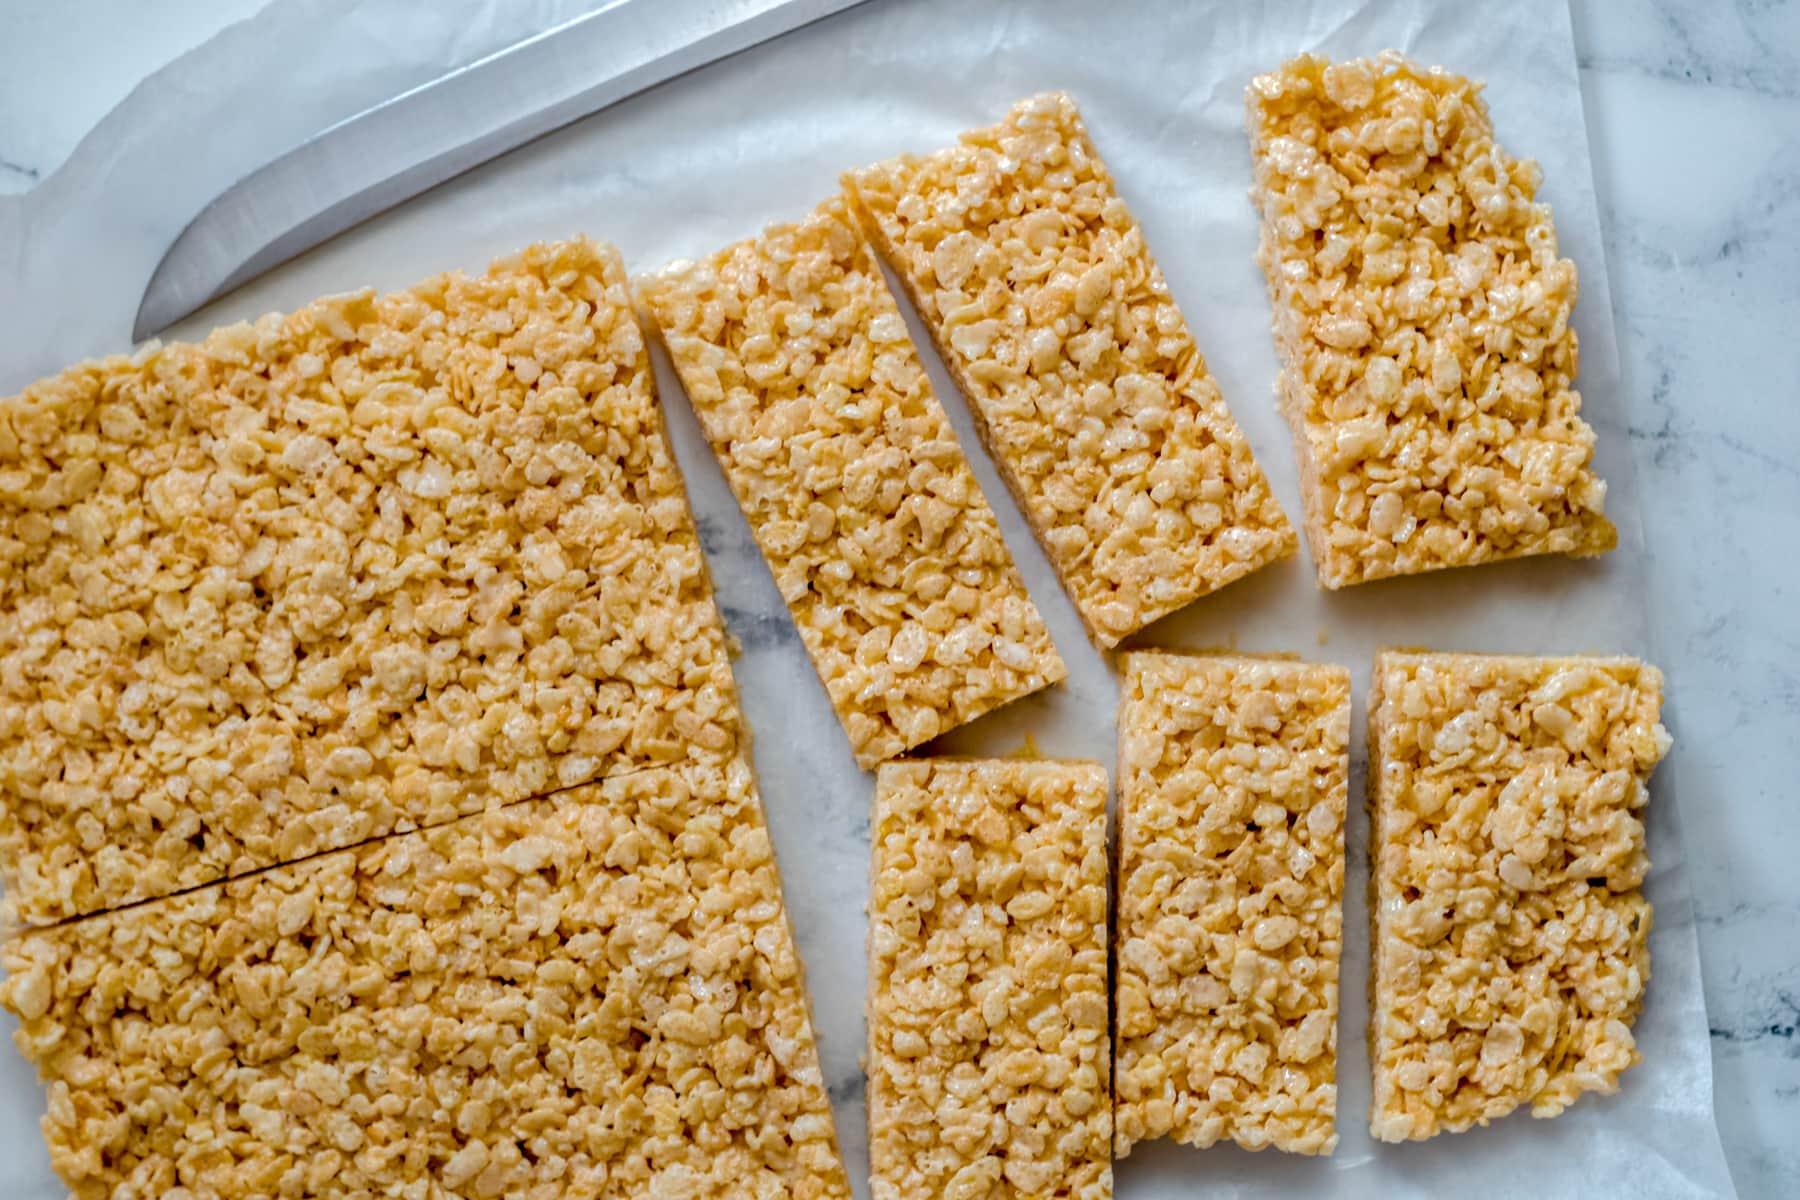
Cut the slab of rice krispies treats into quarters, then cut each quarter into 3 pieces making rectangles. You will end up with 12 pieces.
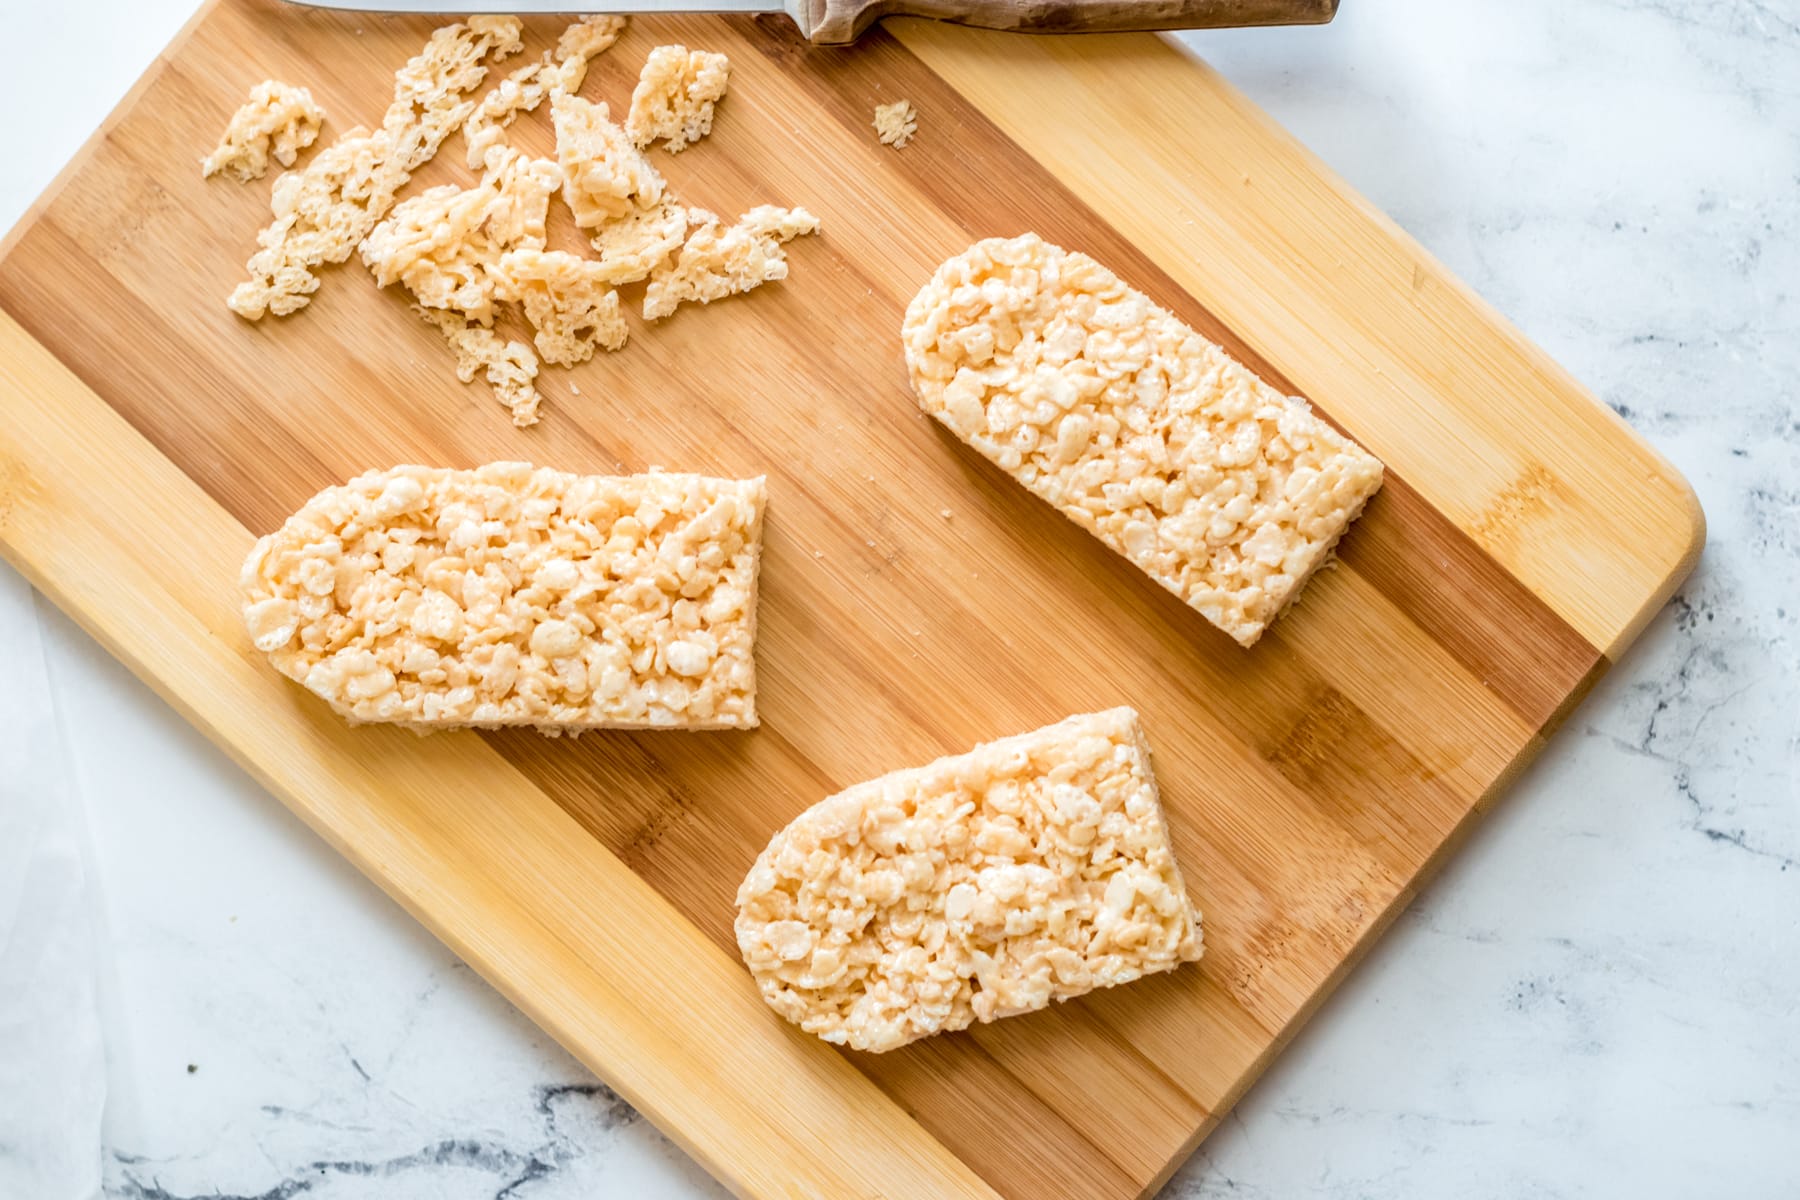
You can leave them as a rectangle or trim the top corners off to make them popsicle shaped. I never have any issue finding a volunteer to eat the corners I cut off!:)
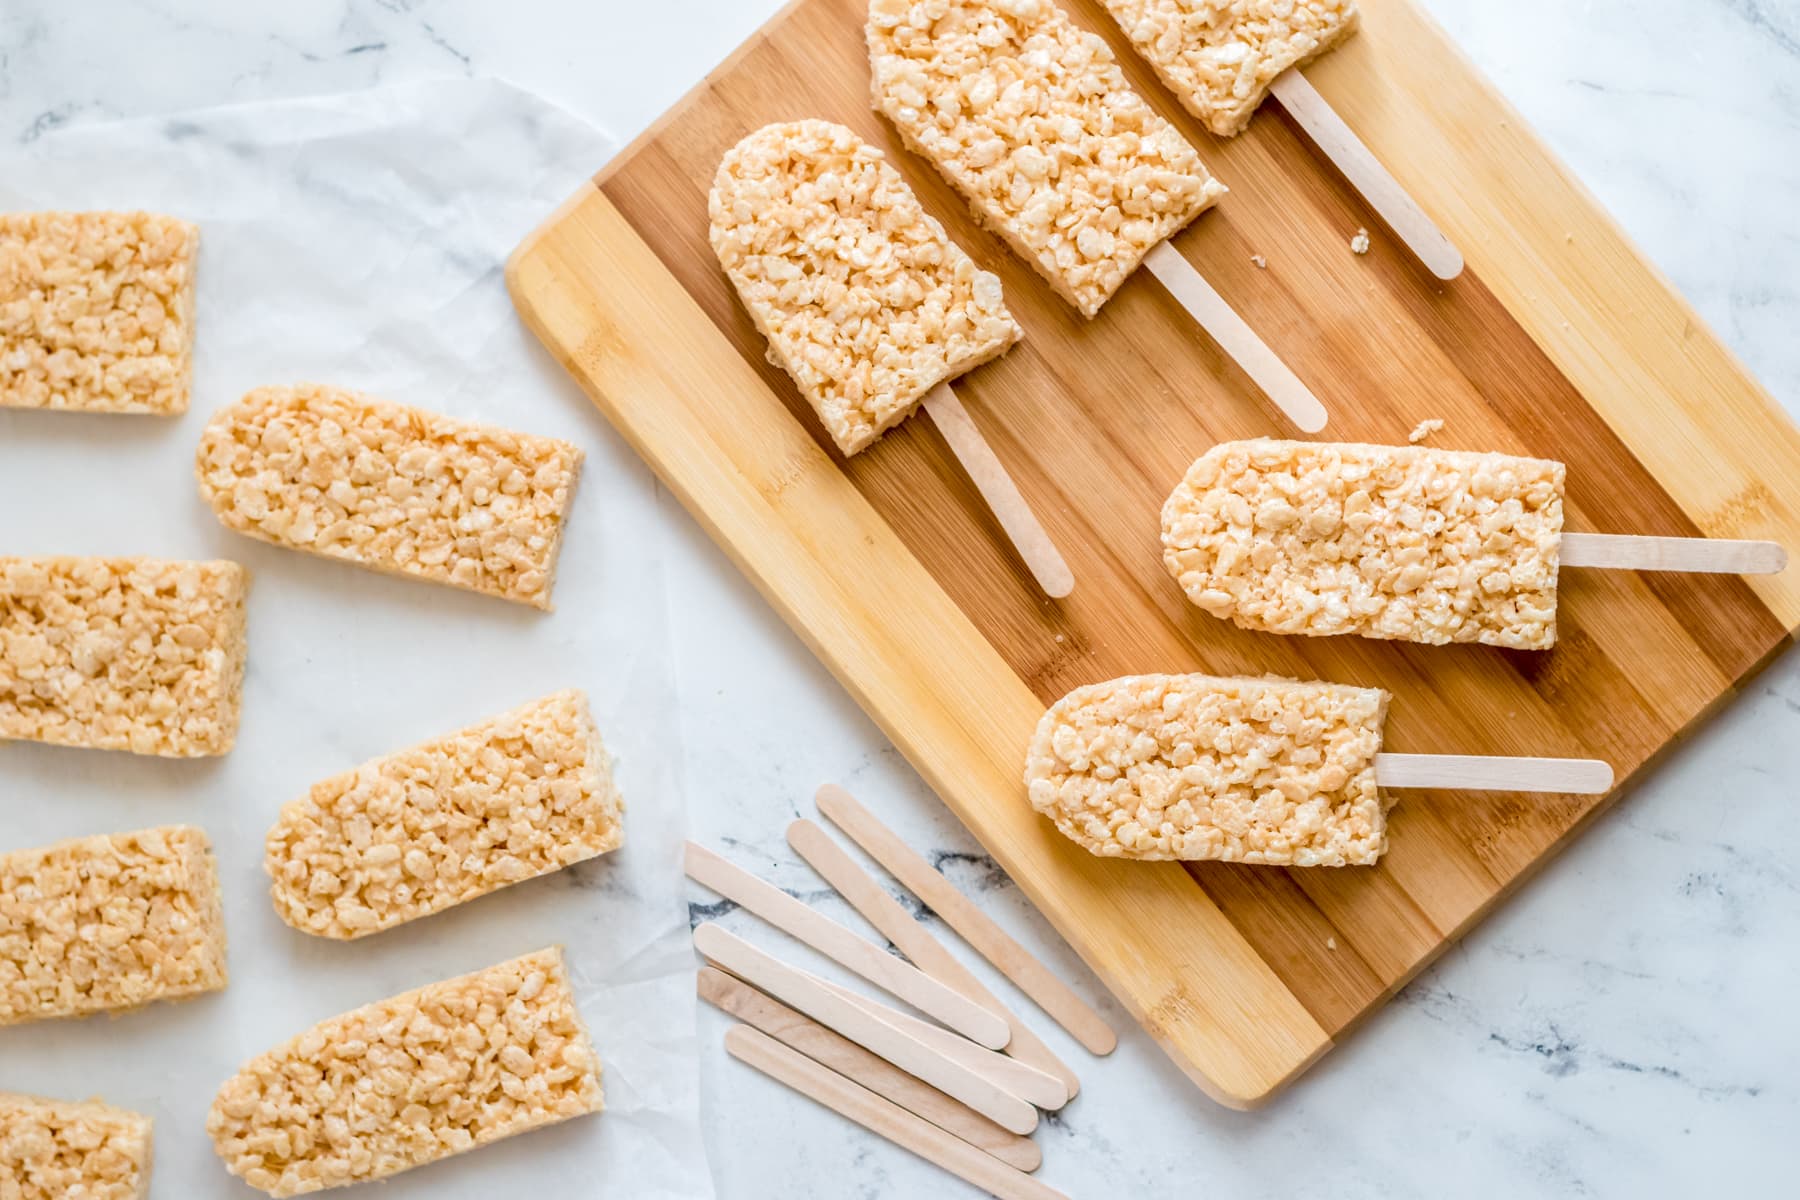
Insert a food grade popsicle stick or a cake pop stick into the bottom of each treat and you are ready to decorate.
The decorating process can get messy, especially if kids are helping. So put some wax paper or parchment paper on your table before you start to help contain the mess.
3. Melt the Chocolate
You can use either a double boiler or the microwave to melt the candy melts.
Double Boiler: In a double boiler heat the candy melts until they are melted and spreadable consistency. If you don’t have a double boiler a saucepan with boiling water topped with a glass bowl works fine.
Microwave: Put the candy melts in a microwave safe bowl. Then microwave them for 30 seconds at a time, stirring in between. Once the candy melts are mostly melted just stir to melt any remaining ones.
4. Decorate
Dip the top of each popsicle into the melted candy. I like to dip about 1/4 to 1/3 of the treat in chocolate because that seems like plenty of chocolate to me. But if you want to coat more than just the top of Rice Krispie pops then use a tall glass to hold the melted chocolate instead of a bowl.
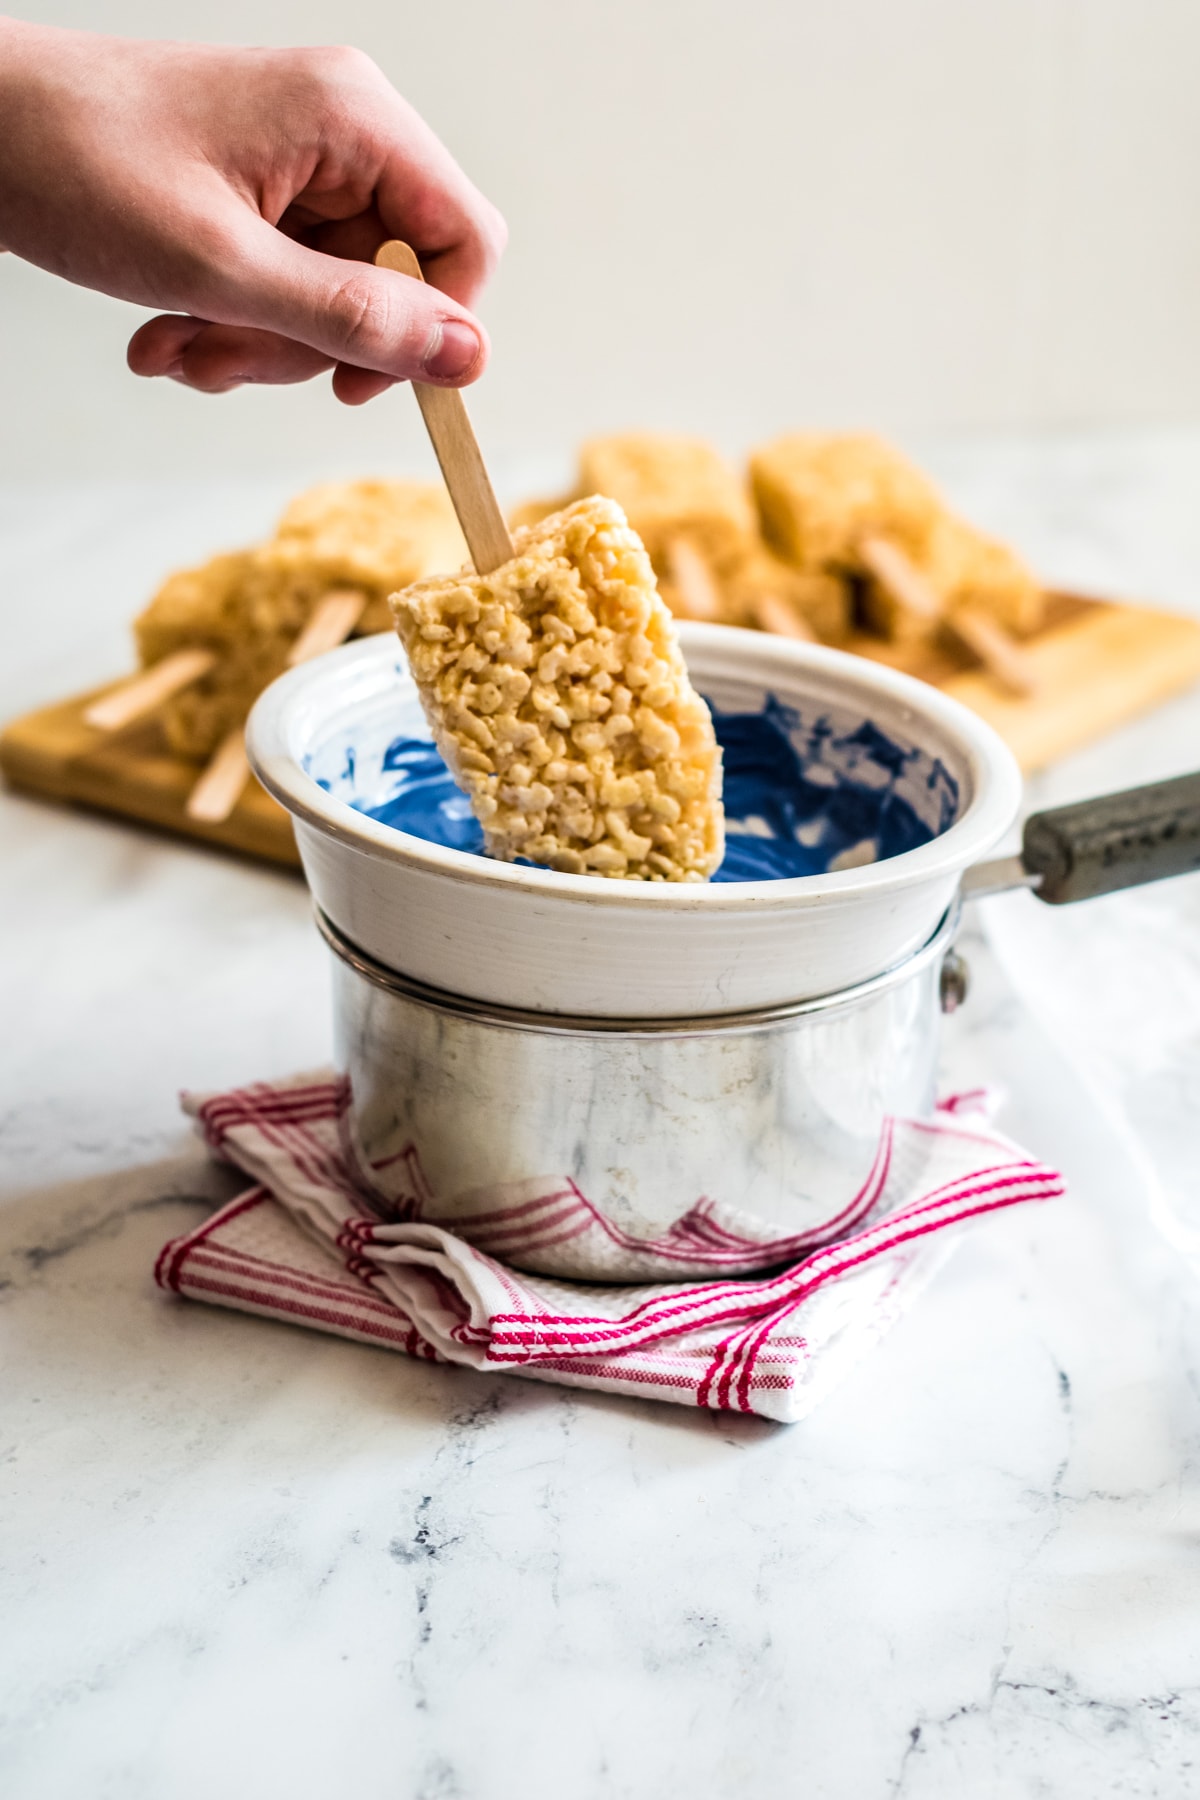
As you dip each popsicle set it aside on the parchment paper. Melt other contrasting colors of chocolate to drizzle on top of the decorated treats if desired.
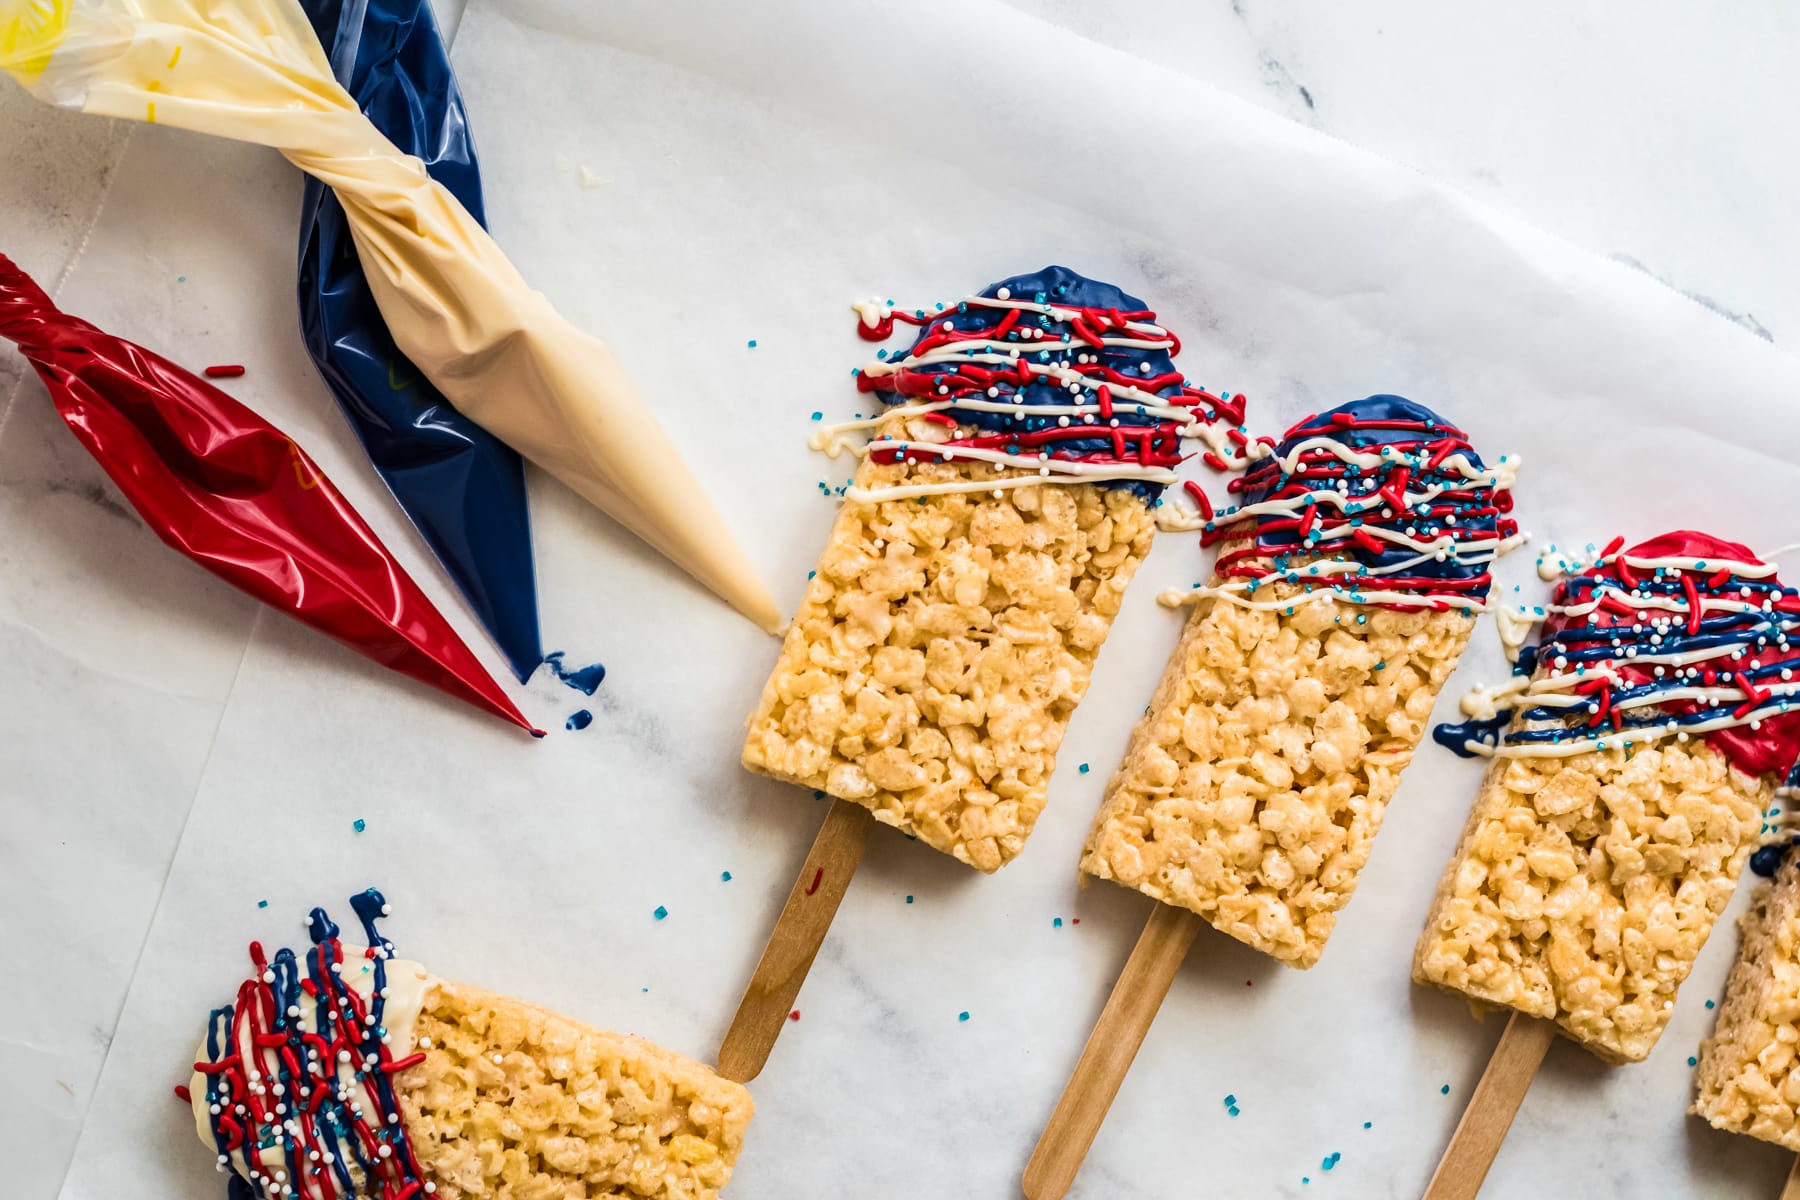
You can put the melted chocolate for drizzling into piping bags or ziploc bags with the corner cut off. You can also just drizzle the melted chocolate right from the bowl with a spoon.
Add some sprinkles on top of the decorated treats while the chocolate is still soft. Let the chocolate covered Rice Krispie treats on a stick cool completely.
If you are in a hurry you can put them in the refrigerator for 10-20 minutes to harden them more quickly.
How to Store
Like most Rice Krispie treats these are going to taste best the same day they are made. But they will keep in an airtight container for up to 3 days.
Tips
If your melted chocolate is too thick you can add a little of shortening or coconut oil to make it more spreadable. If you are using chocolate chips instead of candy melts you will probably want to add coconut oil. Add about 1 teaspoons per cup after the chocolate is melted and stir. Add a little at a time until you get a creamy and smooth consistency.
Don’t try to substitute paper straws for the popsicle sticks, they aren’t sturdy enough to push into the treats.

Variations
You can make chocolate covered rice krispie treats for almost any holiday. Decorate them with red and green candy for Christmas or Funfetti sprinkles for a birthday party. Here are some fun ideas for to decorate them other than sprinkles:
- Shredded coconut
- Chopped nuts
- Mini M&Ms or Sixlets
- Mini chocolate chips
Looking for more delicious desserts? Try No Bake Icebox Cake, S’mores Rice Krispie Treats, or Sugar Cookie Bars.

Chocolate Covered Rice Krispie Treats on a Stick
Ingredients
- 6 cups Rice Krispies Cereal
- 4 cups mini marshmallows or 1 package 10 oz., about 40 regular sized marshmallows
- ¼ cup butter
For Decorating
- 1 cup each of three different colors of candy melts or other chocolate
- assorted sprinkles
- 12 popsicle sticks
Instructions
- Line a baking sheet with parchment or wax paper.
- In a large pan over medium heat melt butter and marshmallows while stirring until they are completely melted and smooth.¼ cup butter, 4 cups mini marshmallows or 1 package
- Remove the pan from the heat and add in Rice Krispies cereal. Stir to evenly coat the cereal.6 cups Rice Krispies Cereal
- Spread the cereal mixture evenly into the lined baking sheet and press gently to make it flat and even. You can spread butter on your hands or use a piece of wax paper or a flat spatula to help. Allow the cereal mixture to cool completely.
- Gently lift the cooled treats out of the pan using the parchment paper and put it on a cutting board.
- Cut the cereal treats in half down the middle and then down the center lengthwise. Cut each quarter
into thirds creating rectangle pieces. If desired trim the corners off of the rectangles to create a popsicle shape. - Press a popsicle stick into the bottom of all of the rice krispie treats.12 popsicle sticks
- The decorating process can be messy, so cover the table with parchment paper before you start.
- Use either a double boiler or the microwave to melt the chocolate to coat the treats. If using a double boiler, heat the candy melts until they are melted and spreadable consistency. If using a microwave put the melts in a microwave safe bowl and microwave in 30 second intervals, stirring after each, until is is smooth and spreadable.1 cup each of three different colors of candy melts or other chocolate
- Dip the top of each popsicle into your candy melts. You can also use a spoon or spatula to spread the chocolate. If you want to dip more of the popsicle put the candy melts in a tall glass.
- Lay the dipped popsicles on your prepared table to cool.
- You can drizzle extra chocolate on top of the coated popsicles. Or you can put the remaining melted chocolate in a piping bag or ziploc bag, cut off the tip and drizzle. Then top them with sprinkles while the chocolate is still soft.assorted sprinkles
Notes
- If your melted chocolate is too thick you can add a little of shortening or coconut oil to make it more spreadable. If you are using chocolate chips instead of candy melts you will probably want to add coconut oil. Add about 1 teaspoons per cup after the chocolate is melted and stir. Add a little at a time until you get a creamy and smooth consistency.
- Don’t try to substitute paper straws for the popsicle sticks, they aren’t sturdy enough to push into the treats.
As an Amazon Associate and member of other affiliate programs, I earn from qualifying purchases.
Nutrition Information
Nutrition facts are estimates.